

Create your account
- Open the account link in your OpenMontage invitation email.
- Already registered? Click Log in. New here? Choose Sign Up.
- Use your invited email address, or the matching Google account.
- For email signup, open the verification email and confirm your address.
- Complete the Welcome form: your details, birth month/year, country and agreements. Submit the form.
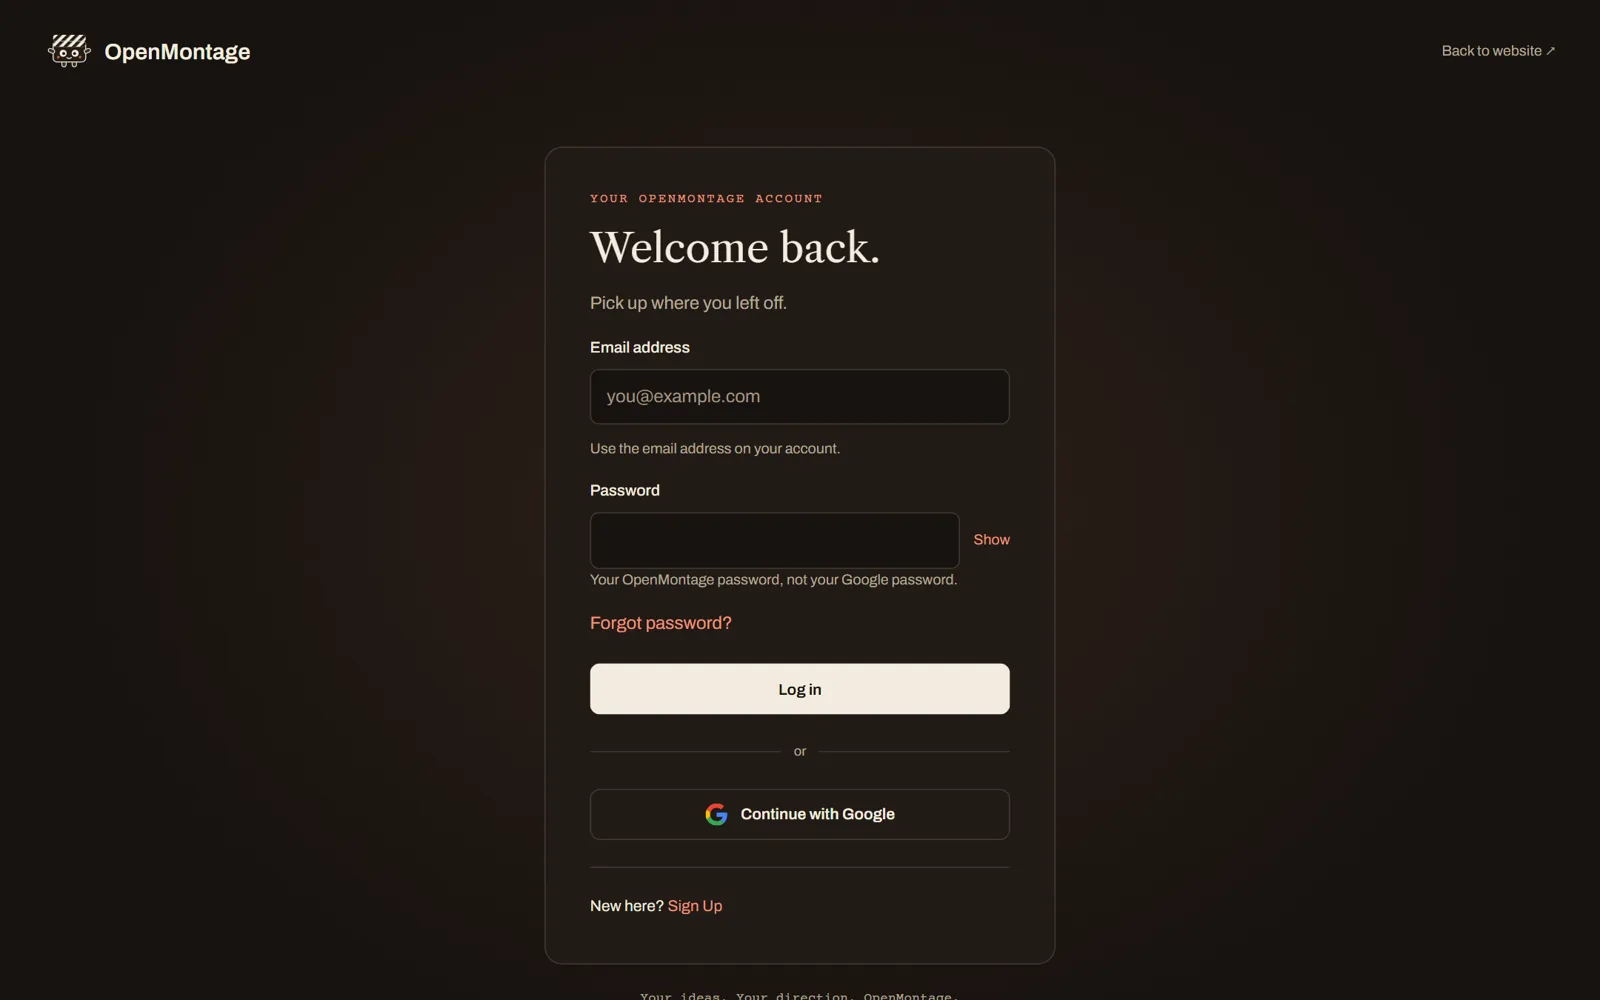
New account: signup and Welcome screens
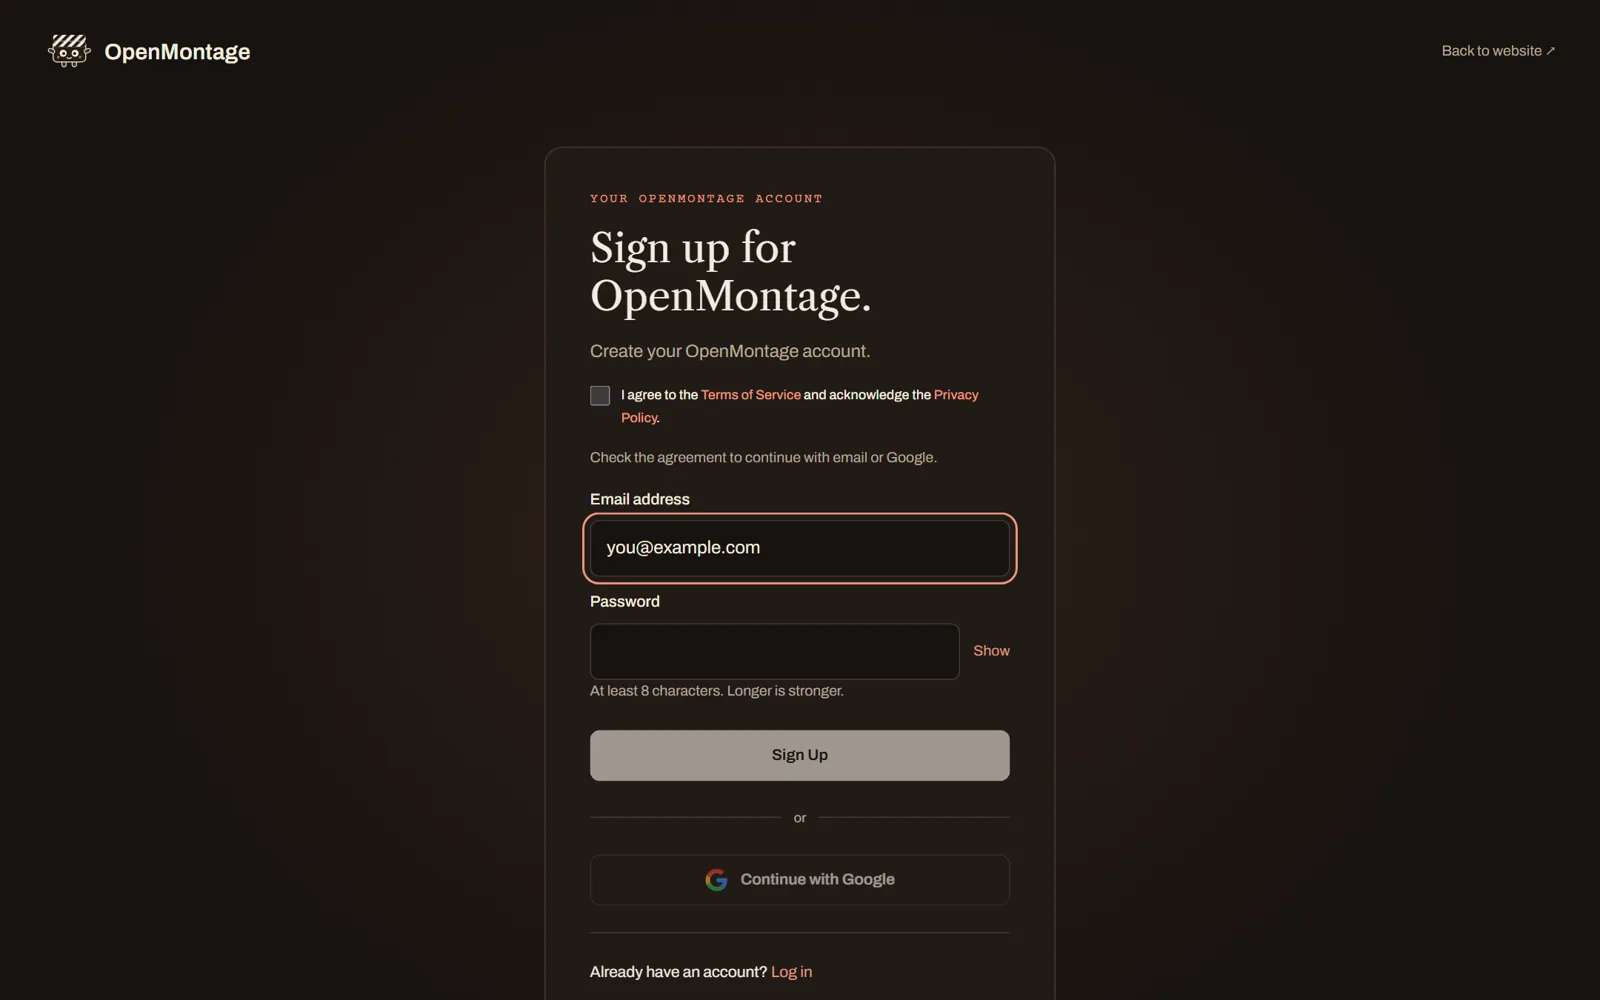
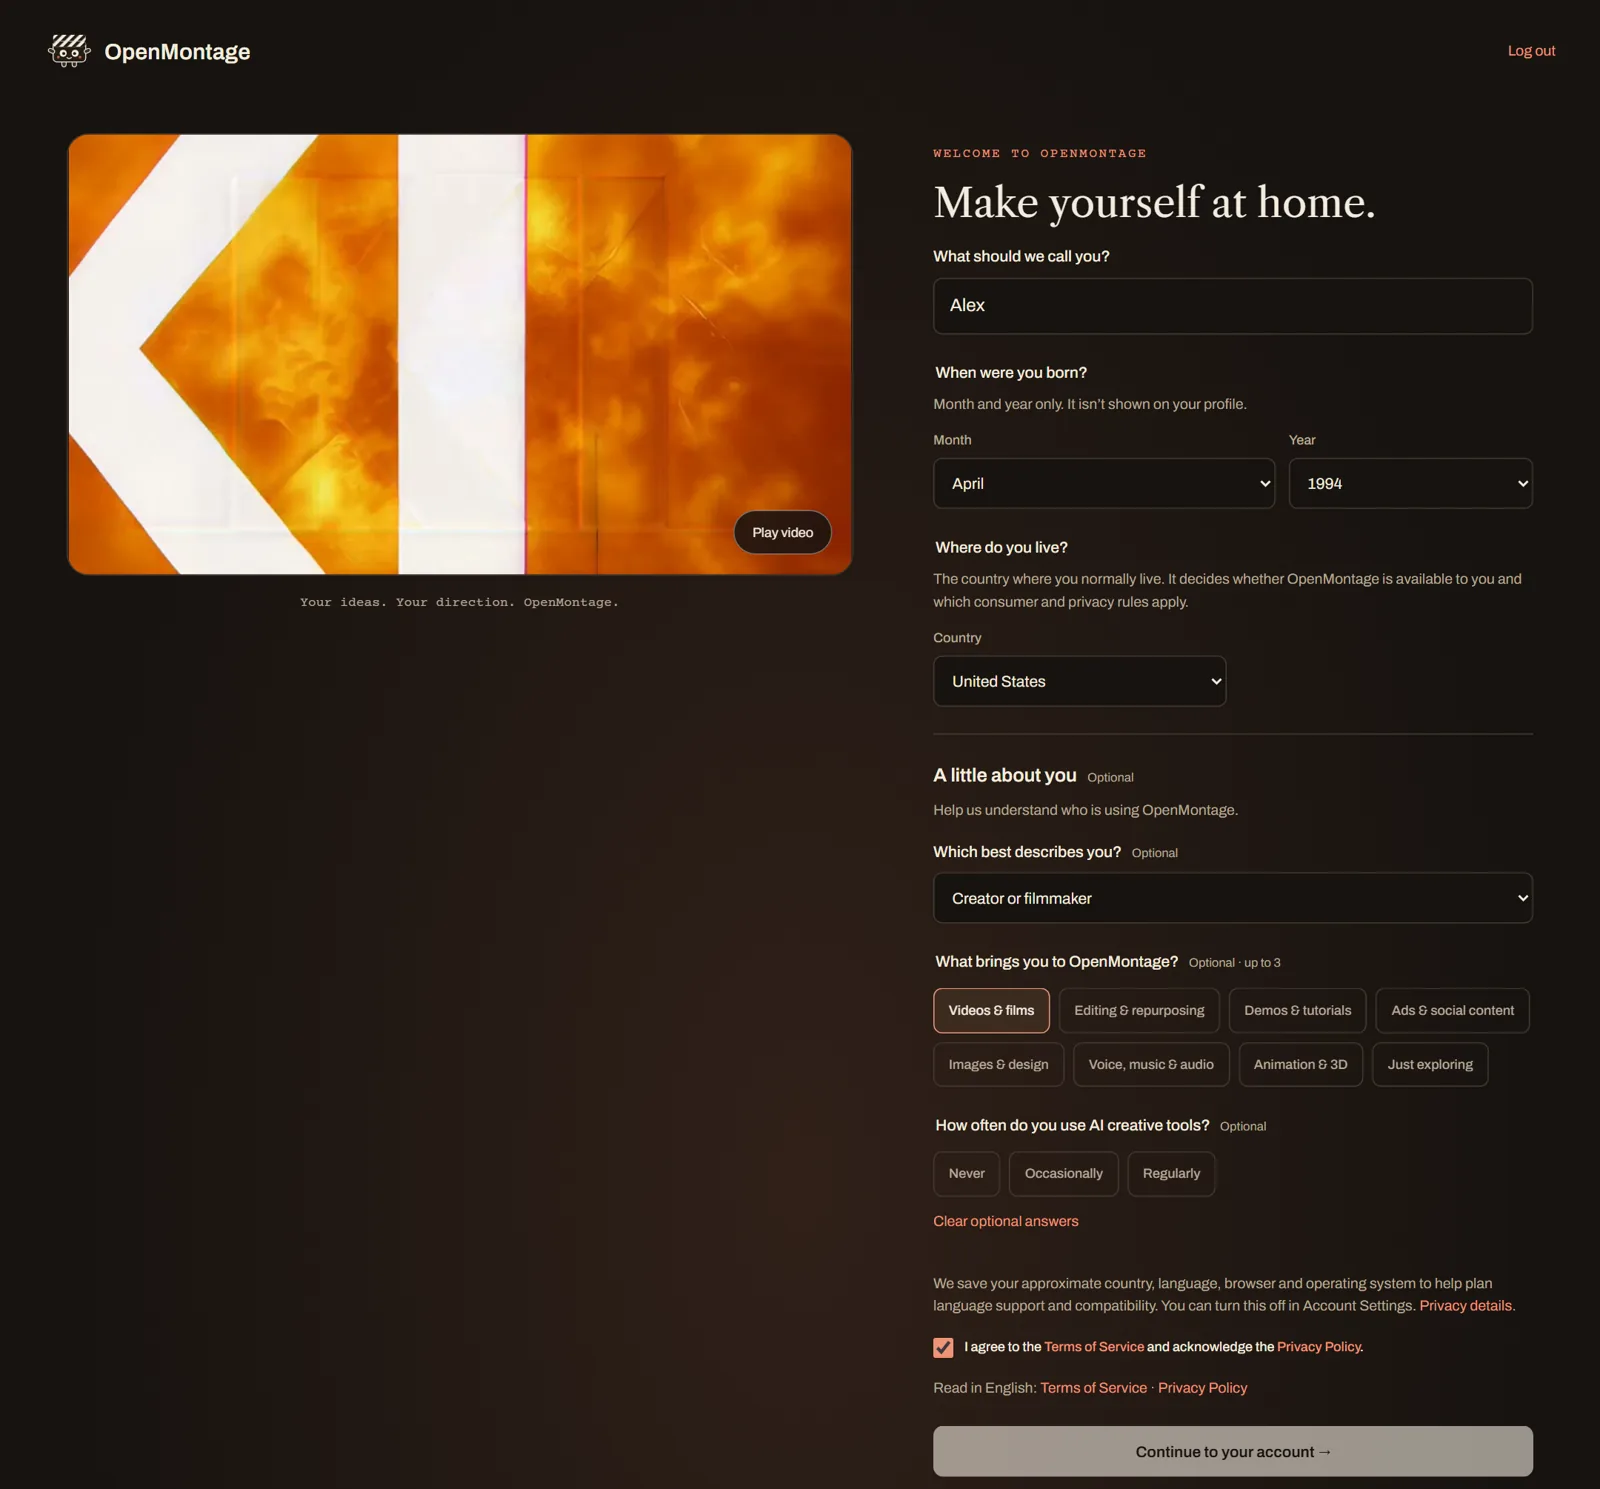
Look for: your account Overview page.
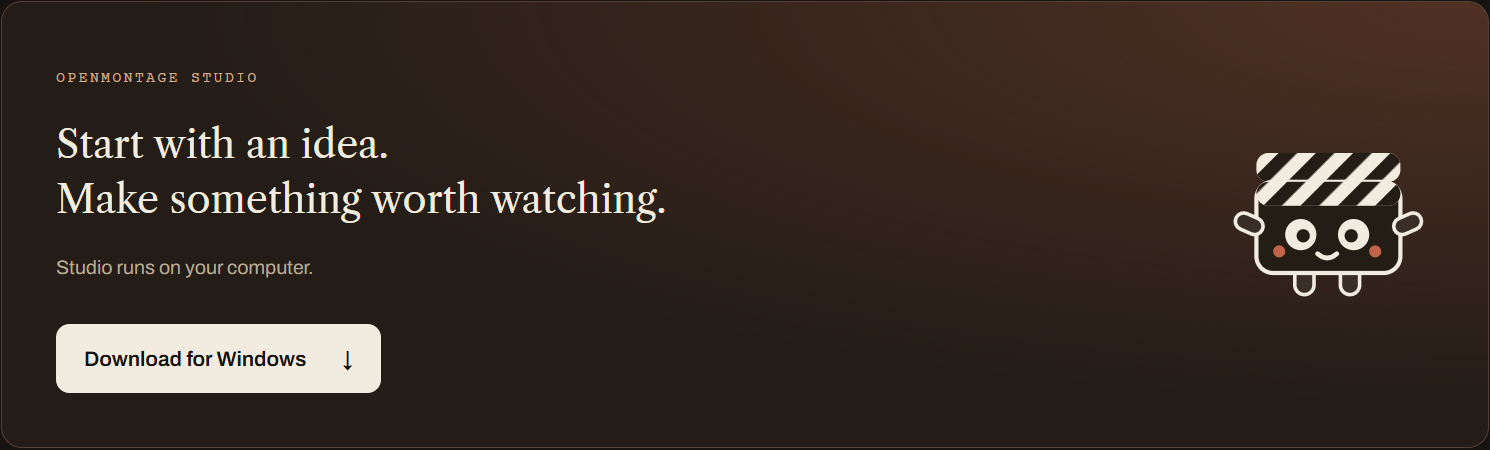
Download and install Studio
- On your account Overview, click Download for Windows.
- Open the downloaded installer and follow its prompts.
- Launch OpenMontage Studio.
Windows shows “Windows protected your PC”
- Check that the installer came from your OpenMontage account page.
- If you trust that download, choose More info → Run anyway.
Sign in to Studio
- In Studio, click Sign in. Your browser opens.
- Sign in to the same OpenMontage account.
- Complete the request to connect Studio in the browser.
- Return to Studio after the connection succeeds. If needed, use Return to Studio.
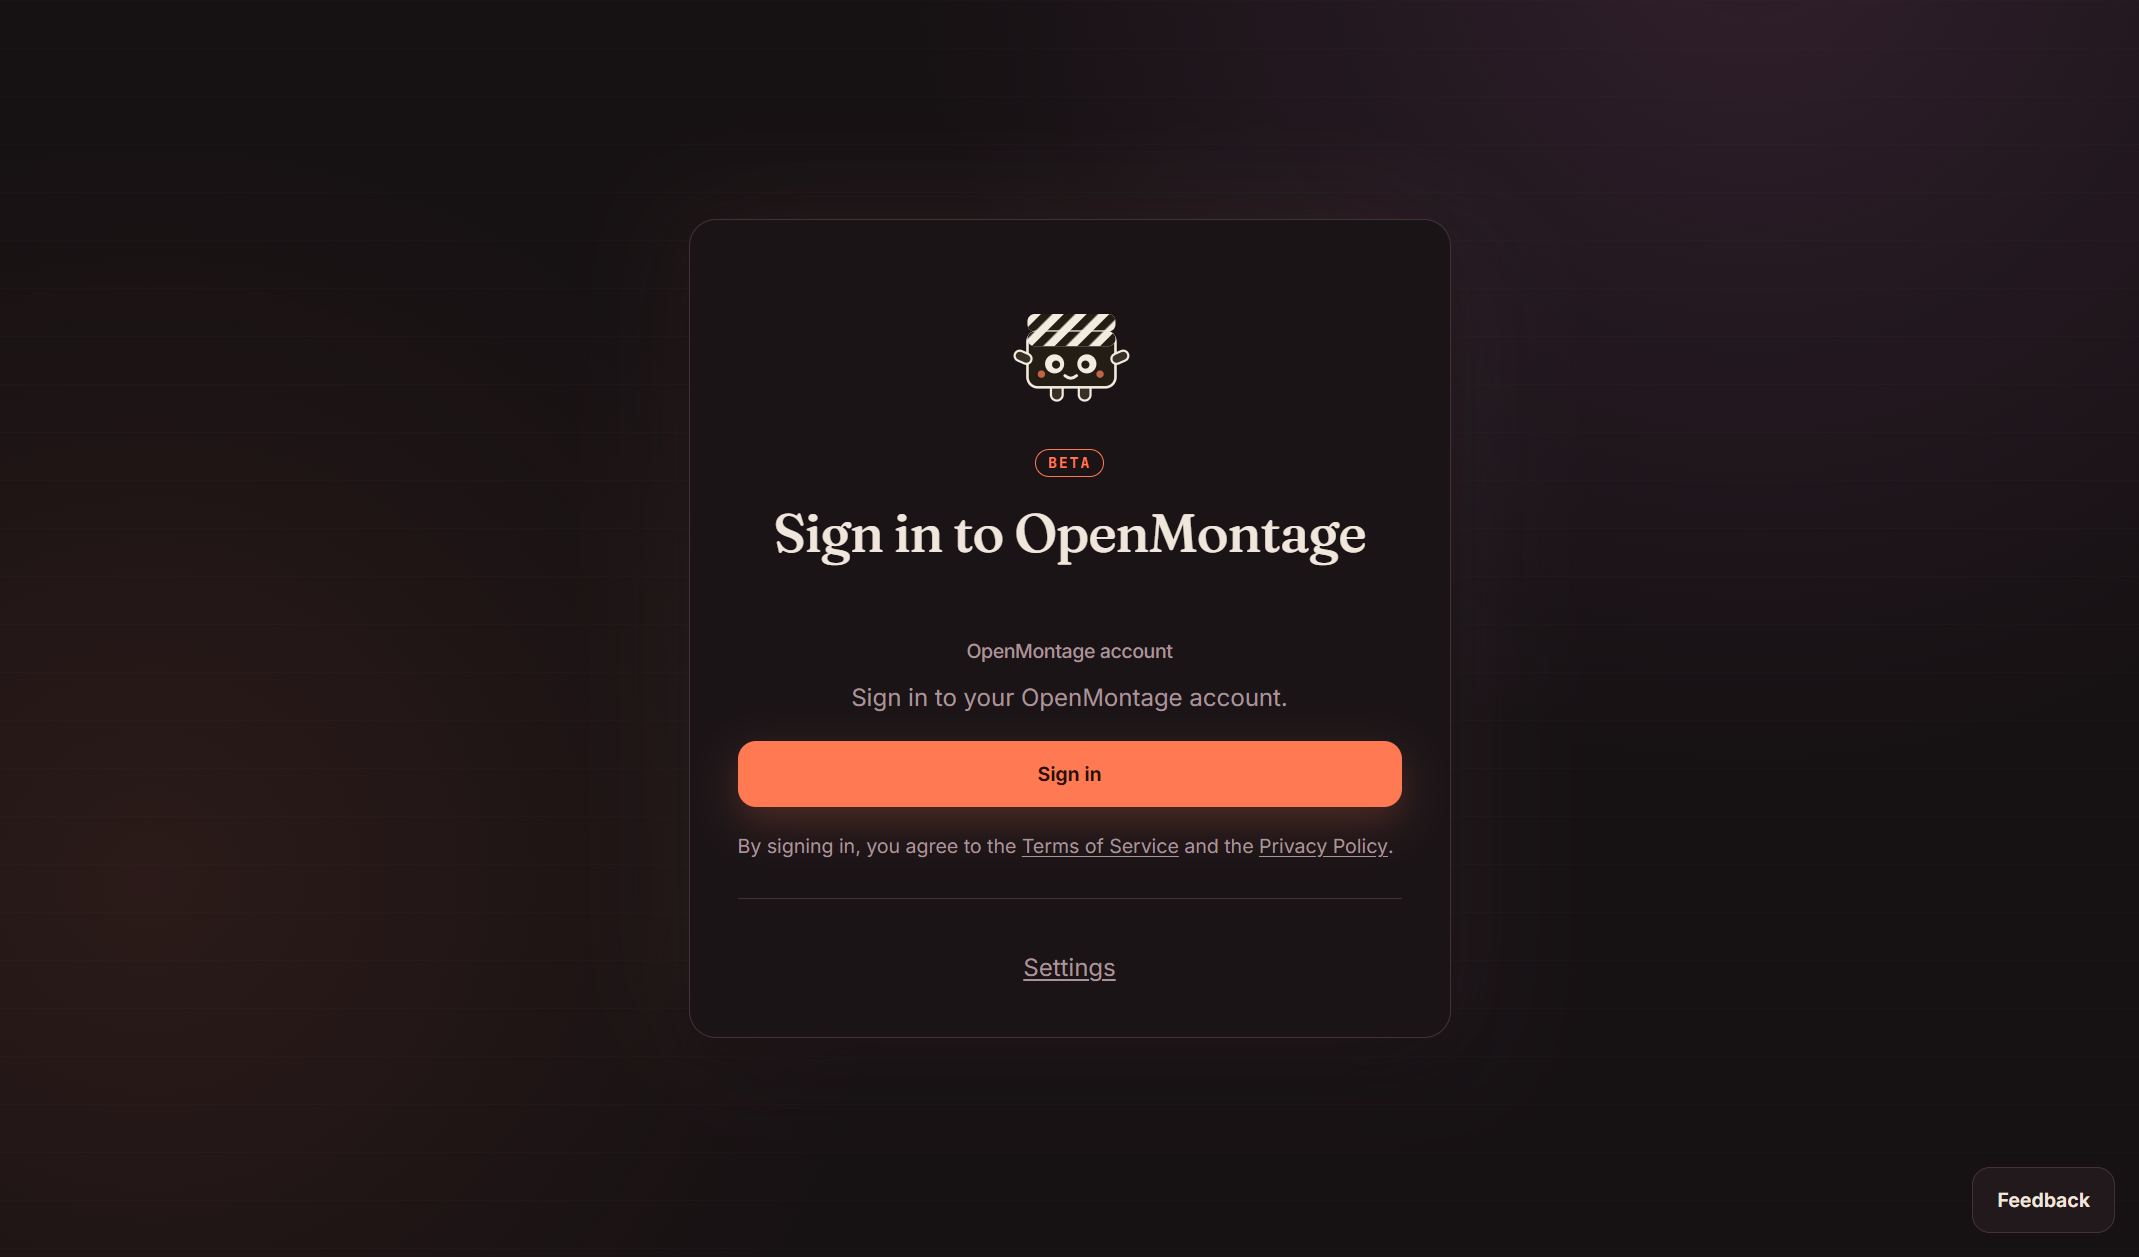
Look for: Studio’s welcome screen, or your home screen if setup is already complete.
Choose where you want to chat
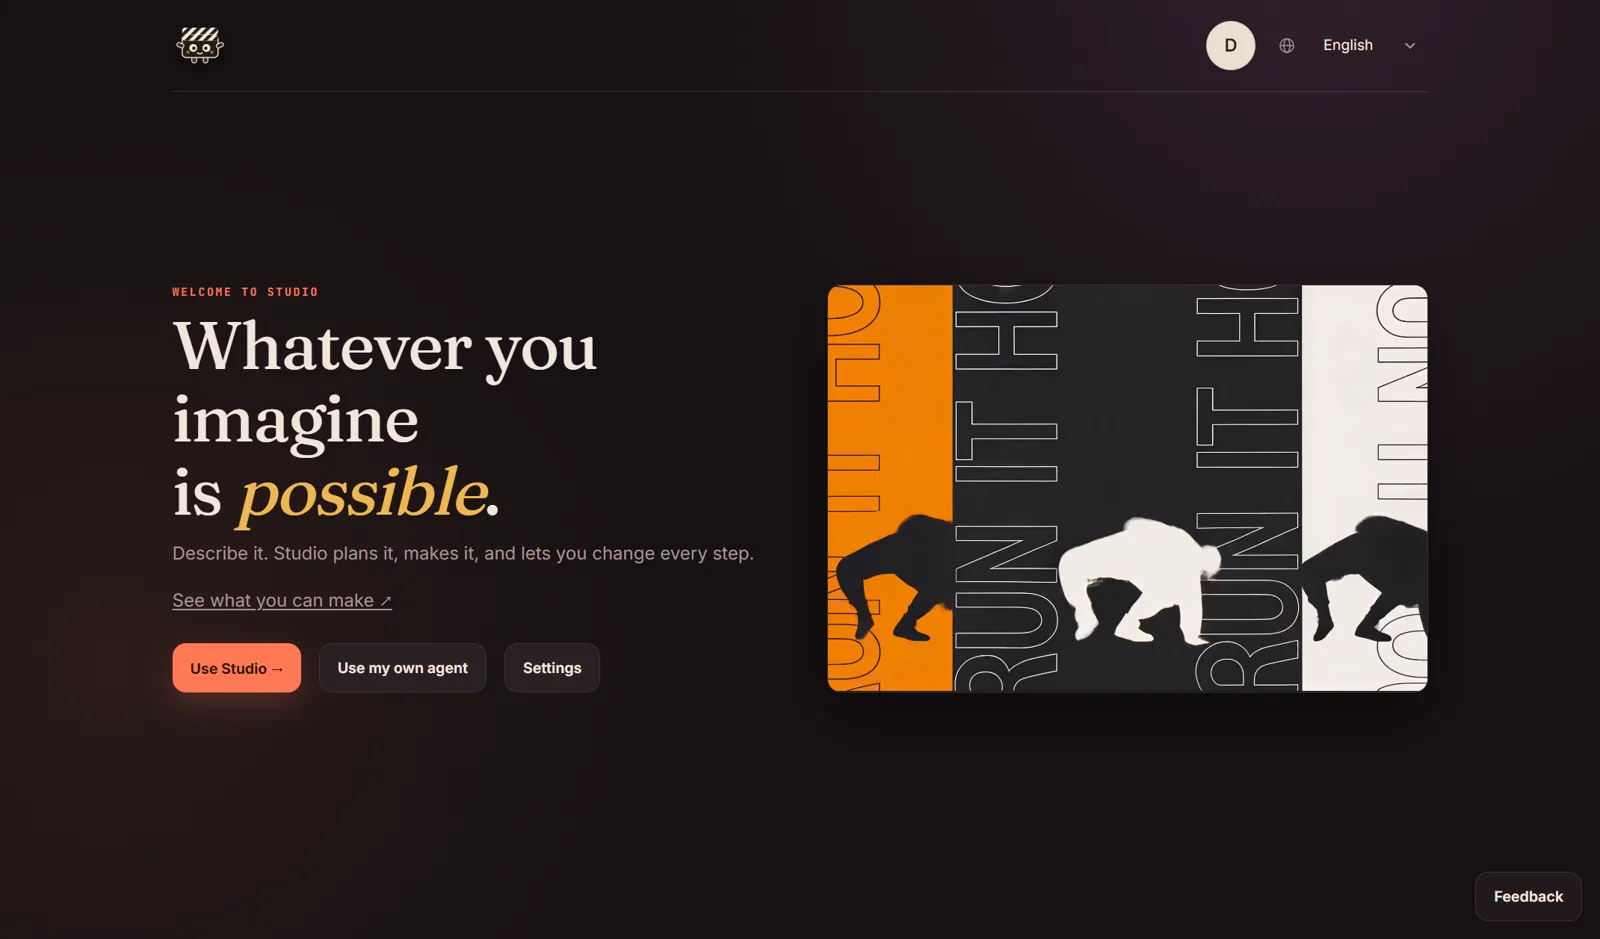
Connect Claude Code or ChatGPT Codex
For Use Studio. Choose one. Claude account sign-in requires Pro or Max. For Codex, use your ChatGPT subscription or an API key.
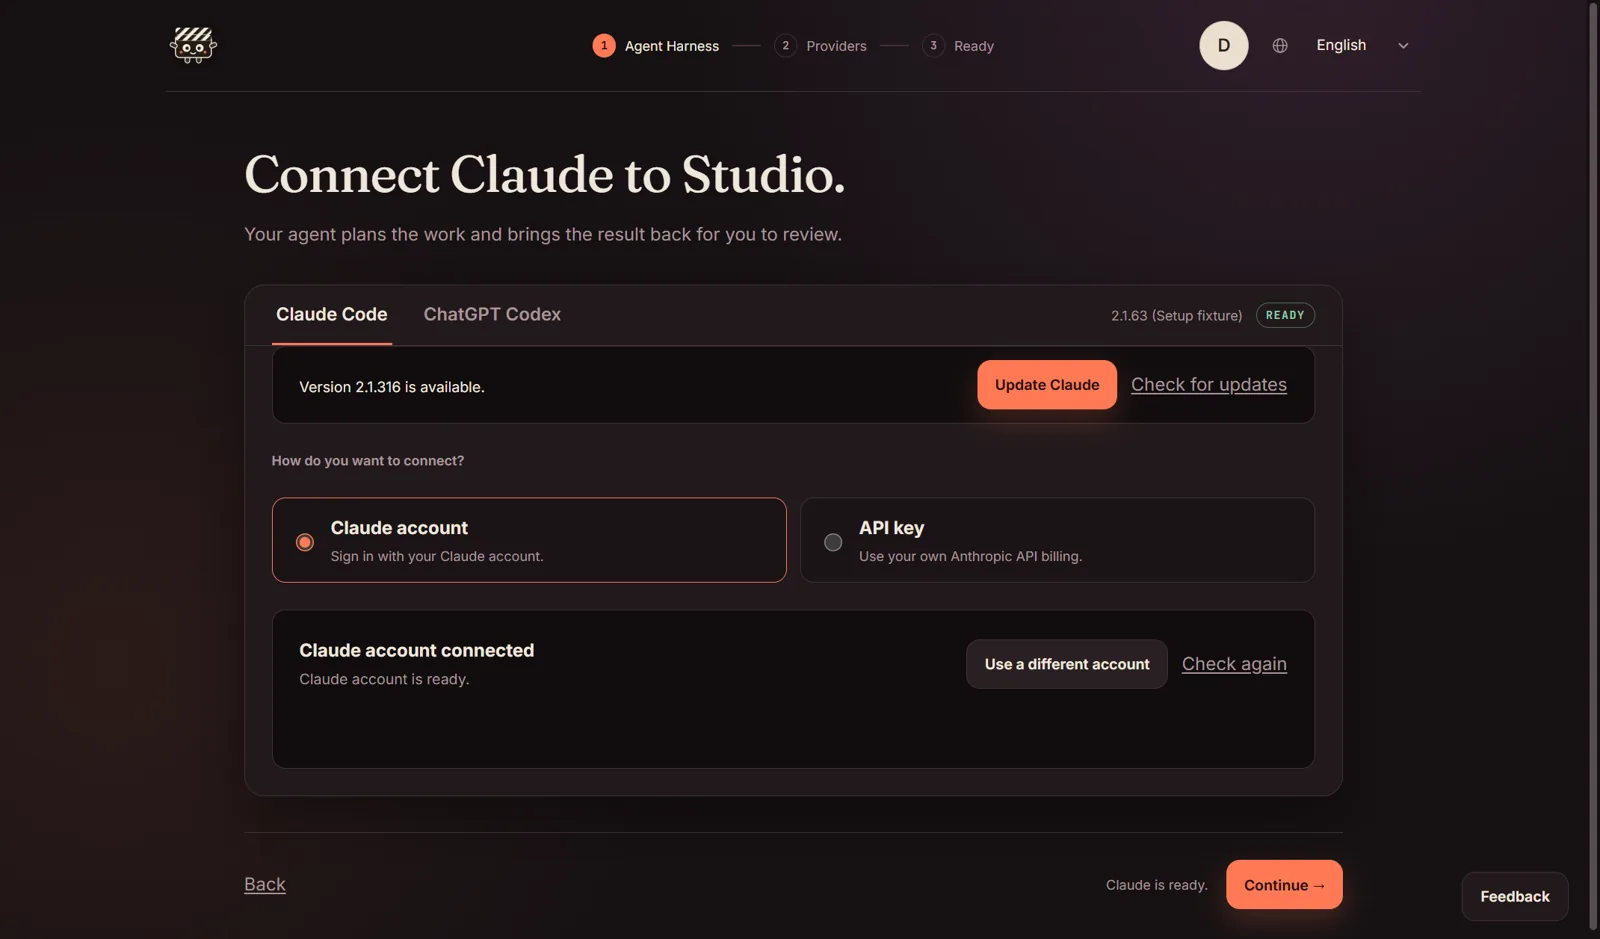
Claude Code
- Select the Claude Code tab.
- If shown, click Install Claude Code or Update Claude Code. Wait for it to finish.
- Choose Claude account, then use the sign-in button. This needs a paid Claude plan (Pro or Max); on the free plan, choose API key instead.
- Finish sign-in in the window that opens. Return to Studio.
- Click Check again if the status has not refreshed.
- When the account is ready, click Continue.
ChatGPT Codex
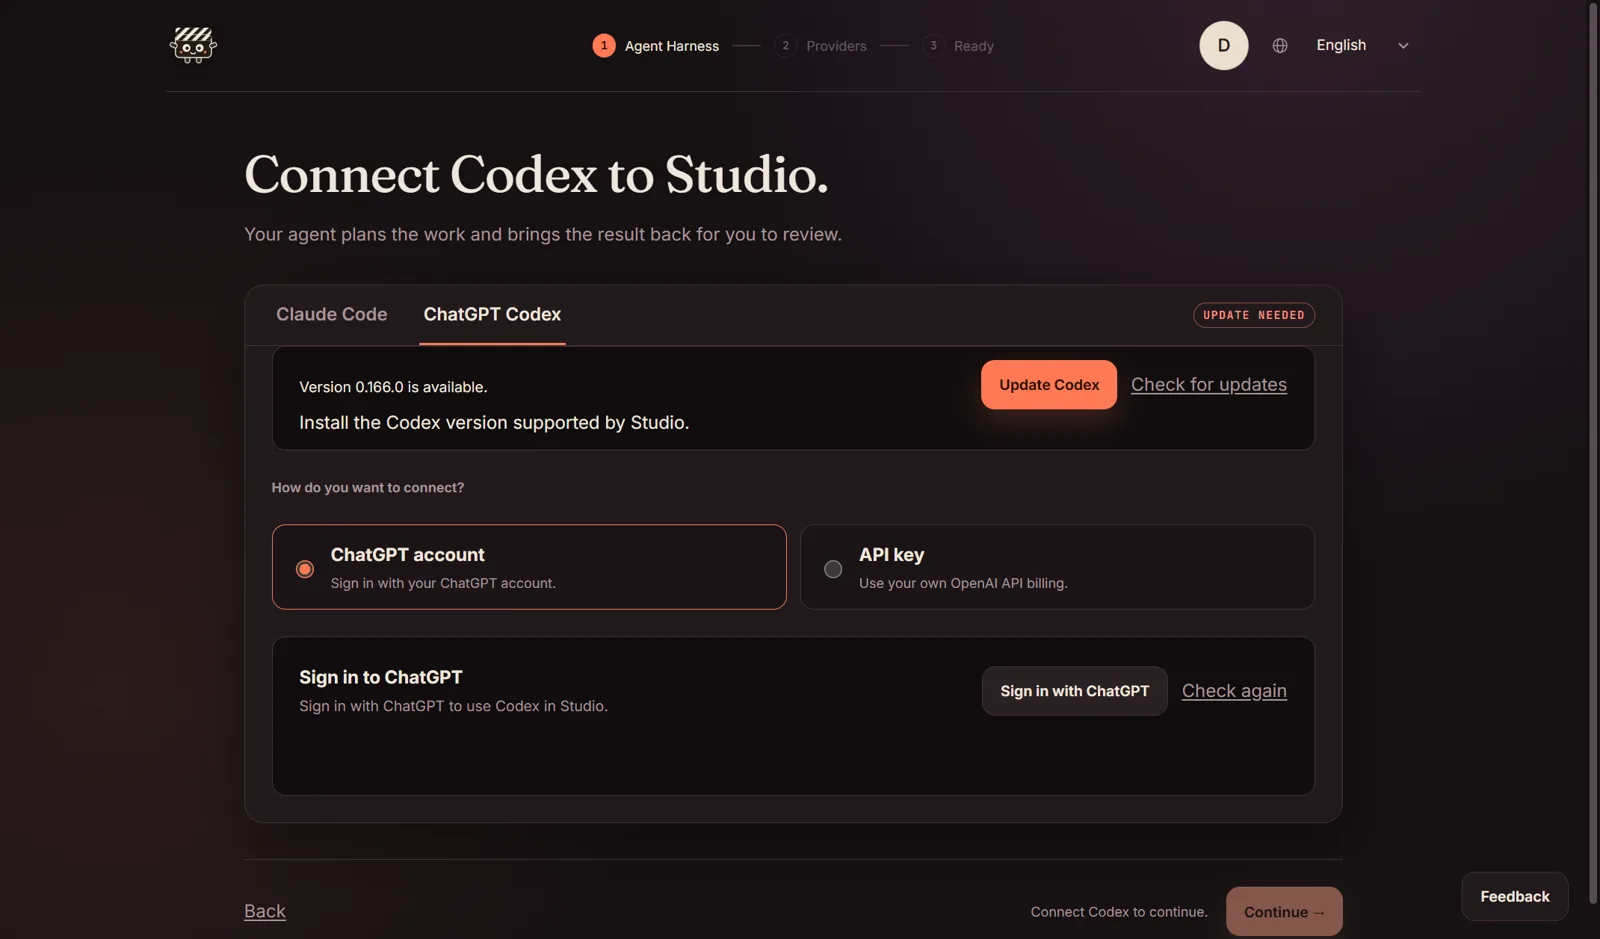
- Select the ChatGPT Codex tab.
- If shown, click Install Codex or Update Codex. Wait for it to finish.
- Choose ChatGPT account, then Sign in with ChatGPT.
- Complete sign-in. Return to Studio and click Check again if needed.
- When the account is ready, click Continue.
Use an API key instead
- Select your agent, then choose API key.
- Get a key from that provider’s developer account.
- Paste it into the matching field in Studio.
- Click Save and check. Continue when ready.
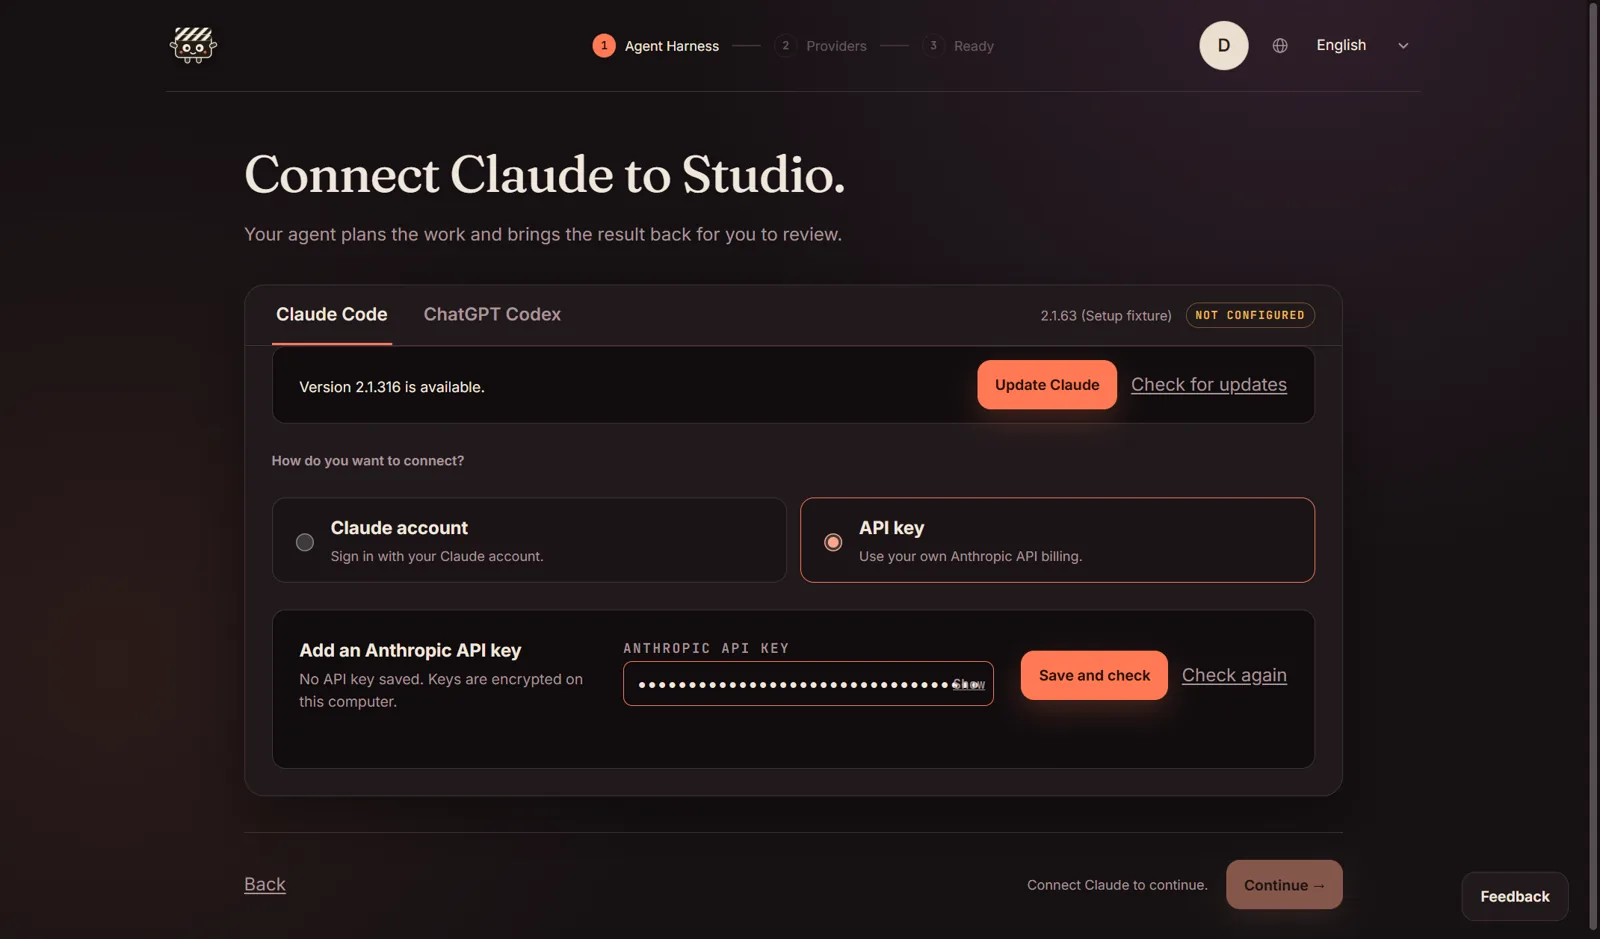
Look for: the media-services setup screen. Continue to step 7.
Use your own agent
For Use my own agent. Your agent must support local tools and MCP.
- Select Use my own agent from the welcome screen. Later: File → Use my own agent.
- Read the access description and tick Allow Access to enable Studio’s local tools.
- Click the copy button. It copies the complete setup instructions.
- Paste into your agent’s chat and send. Let the agent complete the connection.
- Ask it to open your Studio workspace. Use the browser workspace to review productions.
- Add media-provider keys through Manage connections, never in chat.
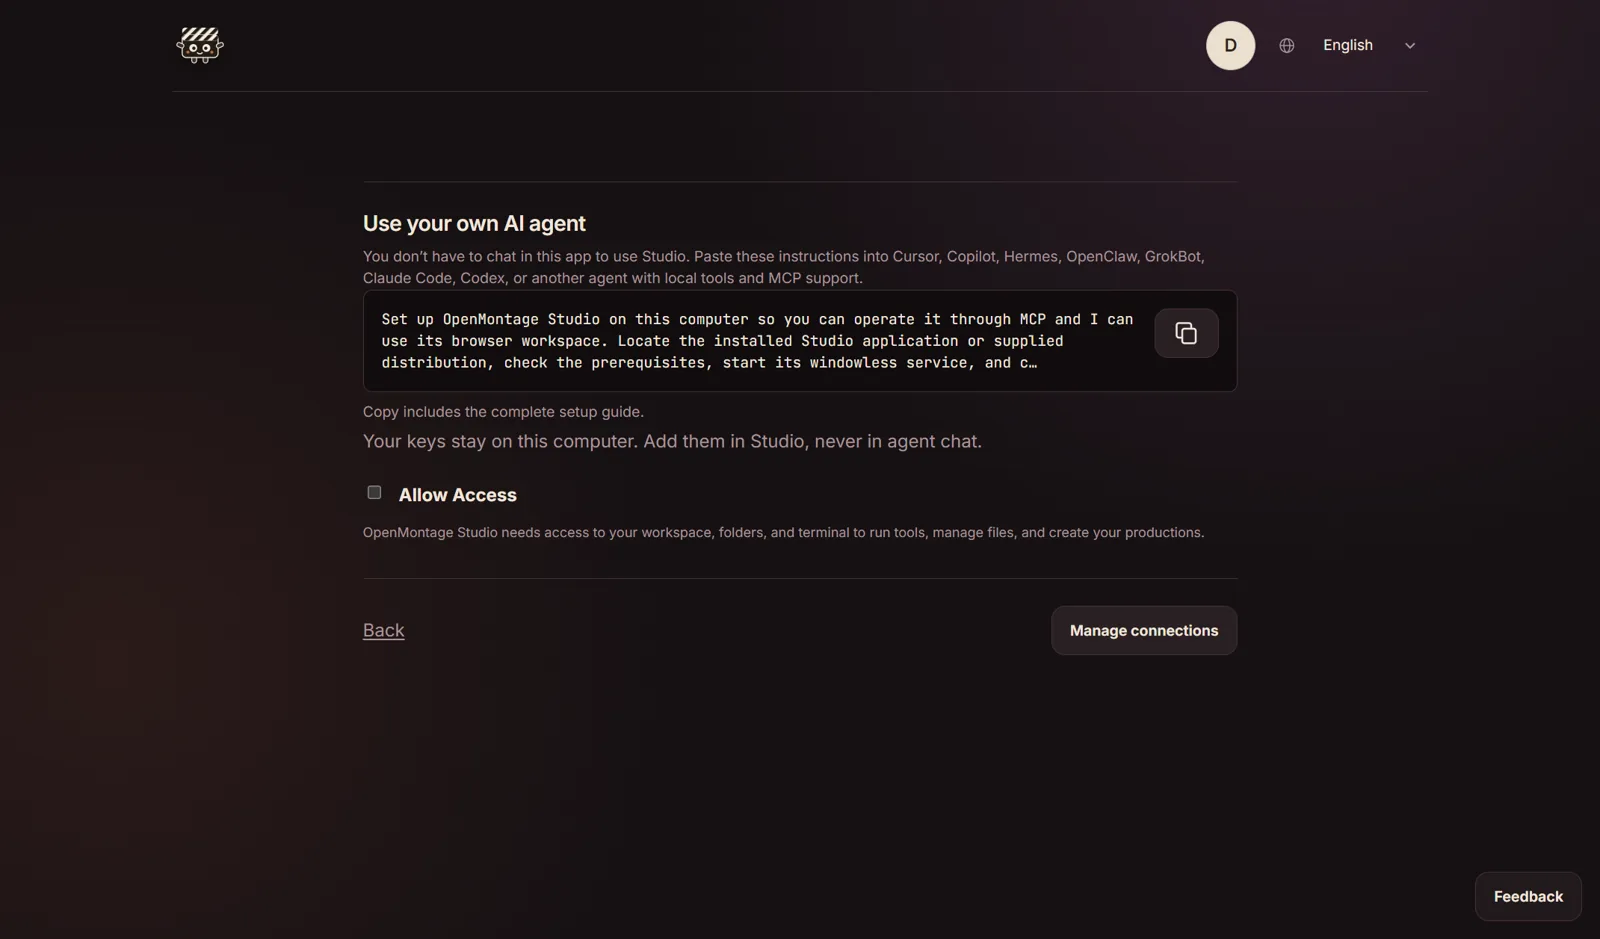
Look for: your agent confirms the connection and opens a Studio workspace.
Continue in your external agent. You do not also need to connect Claude or Codex inside Studio.
Connect the services your video needs
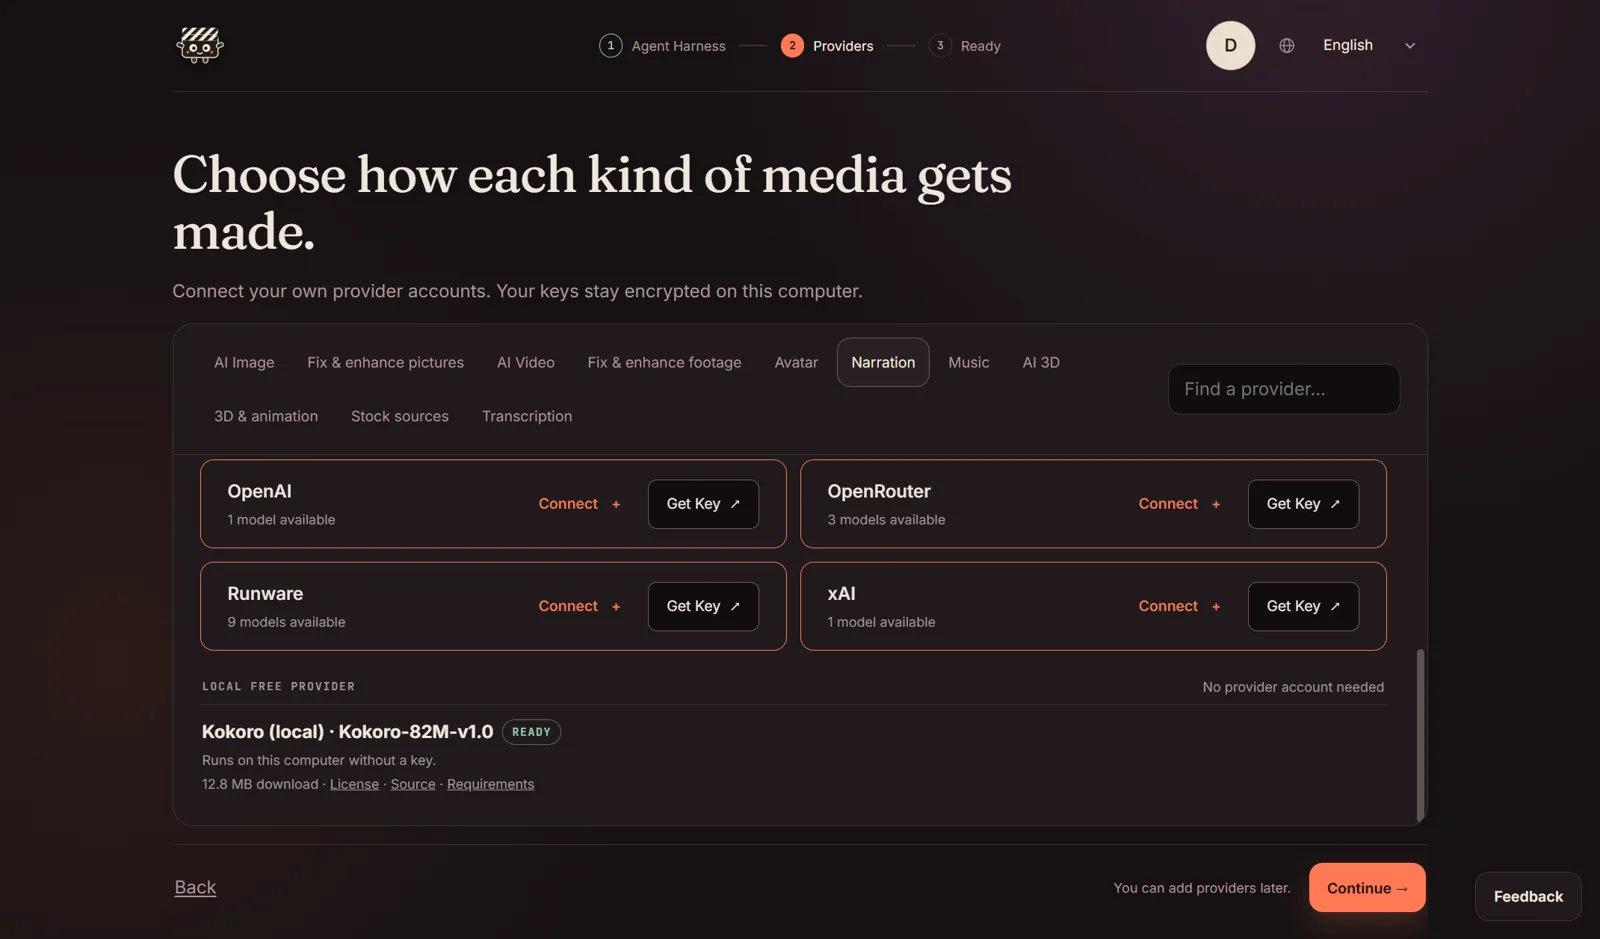
- Choose a media tab, such as Narration, AI Image or AI Video.
- Find your provider. Use Get Key to open its website if you need a key.
- Click Connect and paste the key into Studio.
- Click Test & Save. Check that the provider shows Working.
- Click Continue during setup, or Done in the browser workspace.
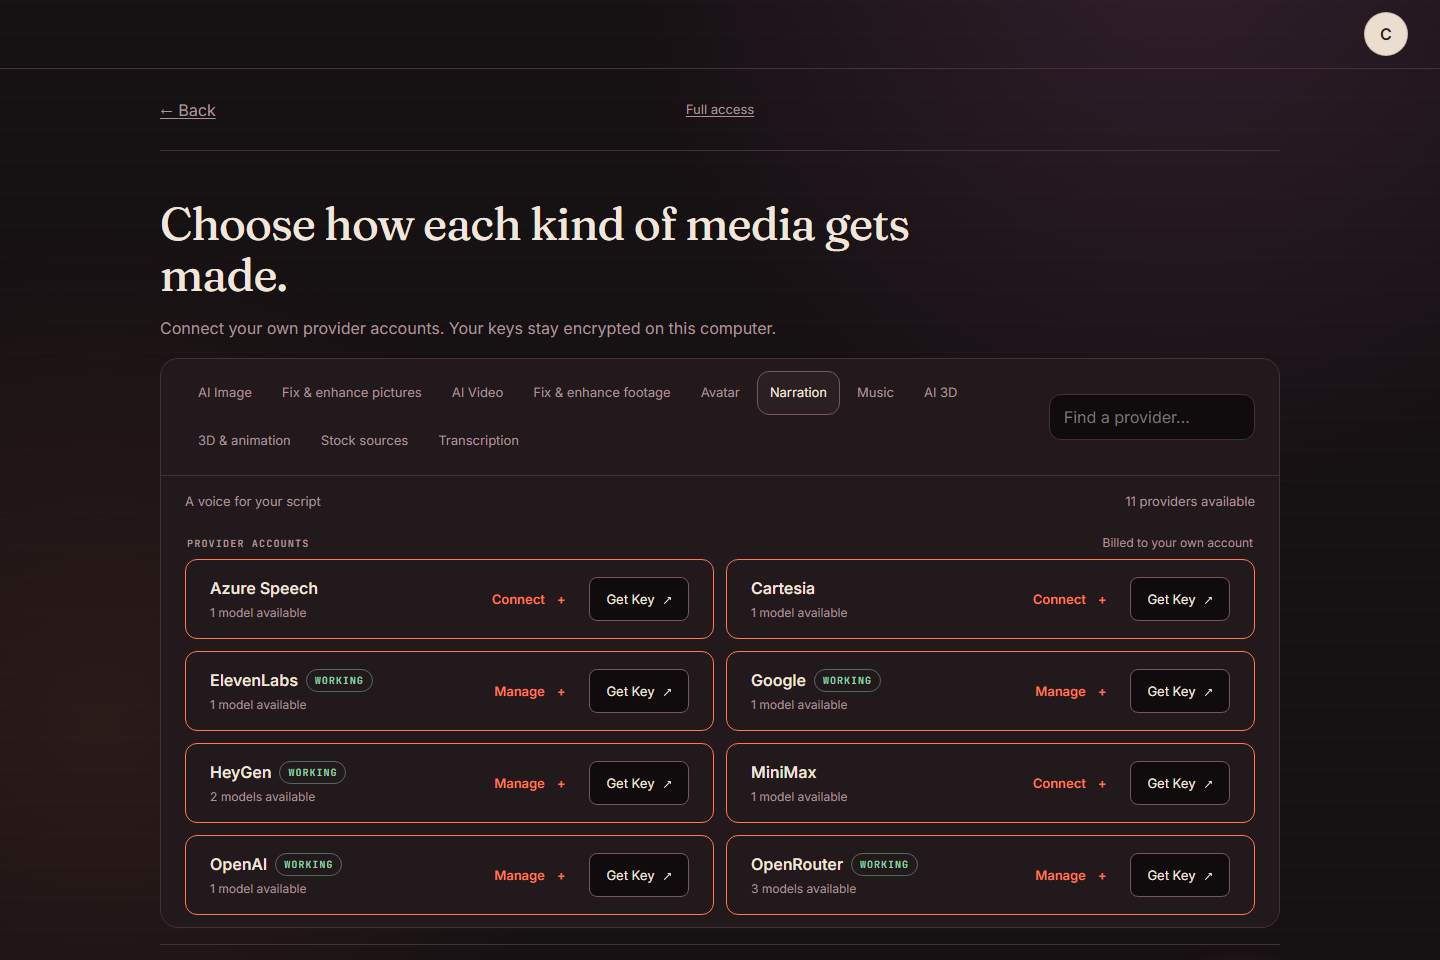
Where to paste your key
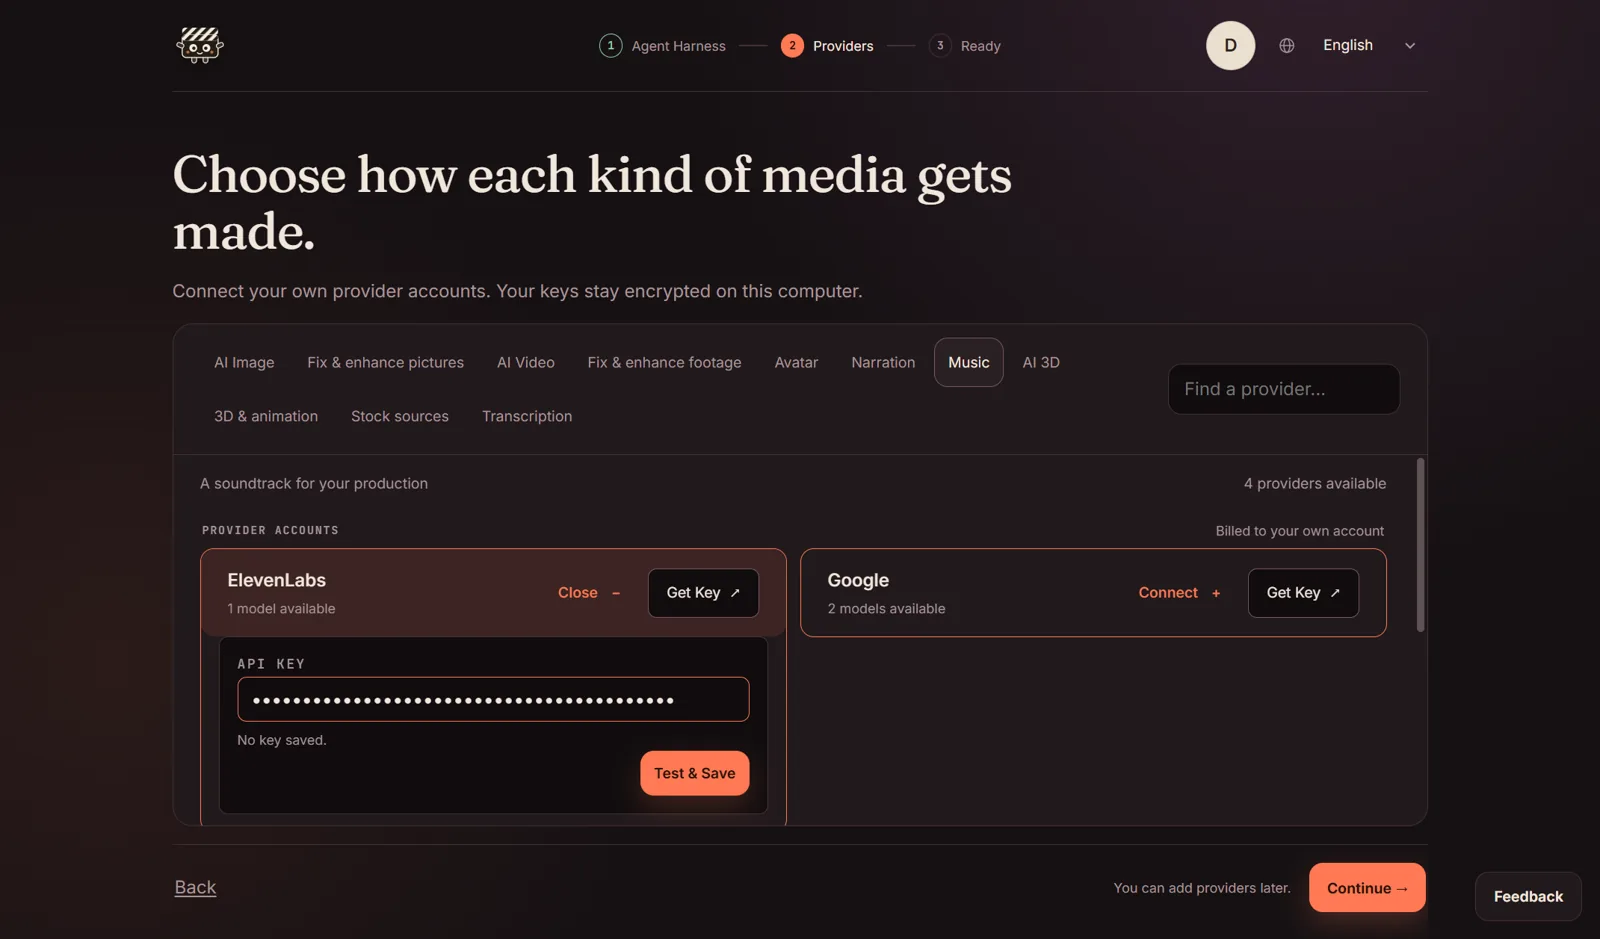
Optional: local voice and included music
- For local narration, choose Narration → Local free providers.
- Find a supported model, such as Kokoro, and click Download & Enable.
- Wait for setup to finish. Select that voice provider when making your video.
- For music, select Included music catalog from the home-screen Music picker.
Optional: Blender / 3D & animation
- Skip this unless your production needs Blender.
- Ask Monty to help install or enable the Studio bridge in Blender.
- Open Manage connections → 3D & animation.
- Enter the bridge’s server address and access key, then Test & Save.
You can skip paid providers and add them later. A Claude or ChatGPT sign-in does not connect your image, video or voice services.
Choose folders and finish setup
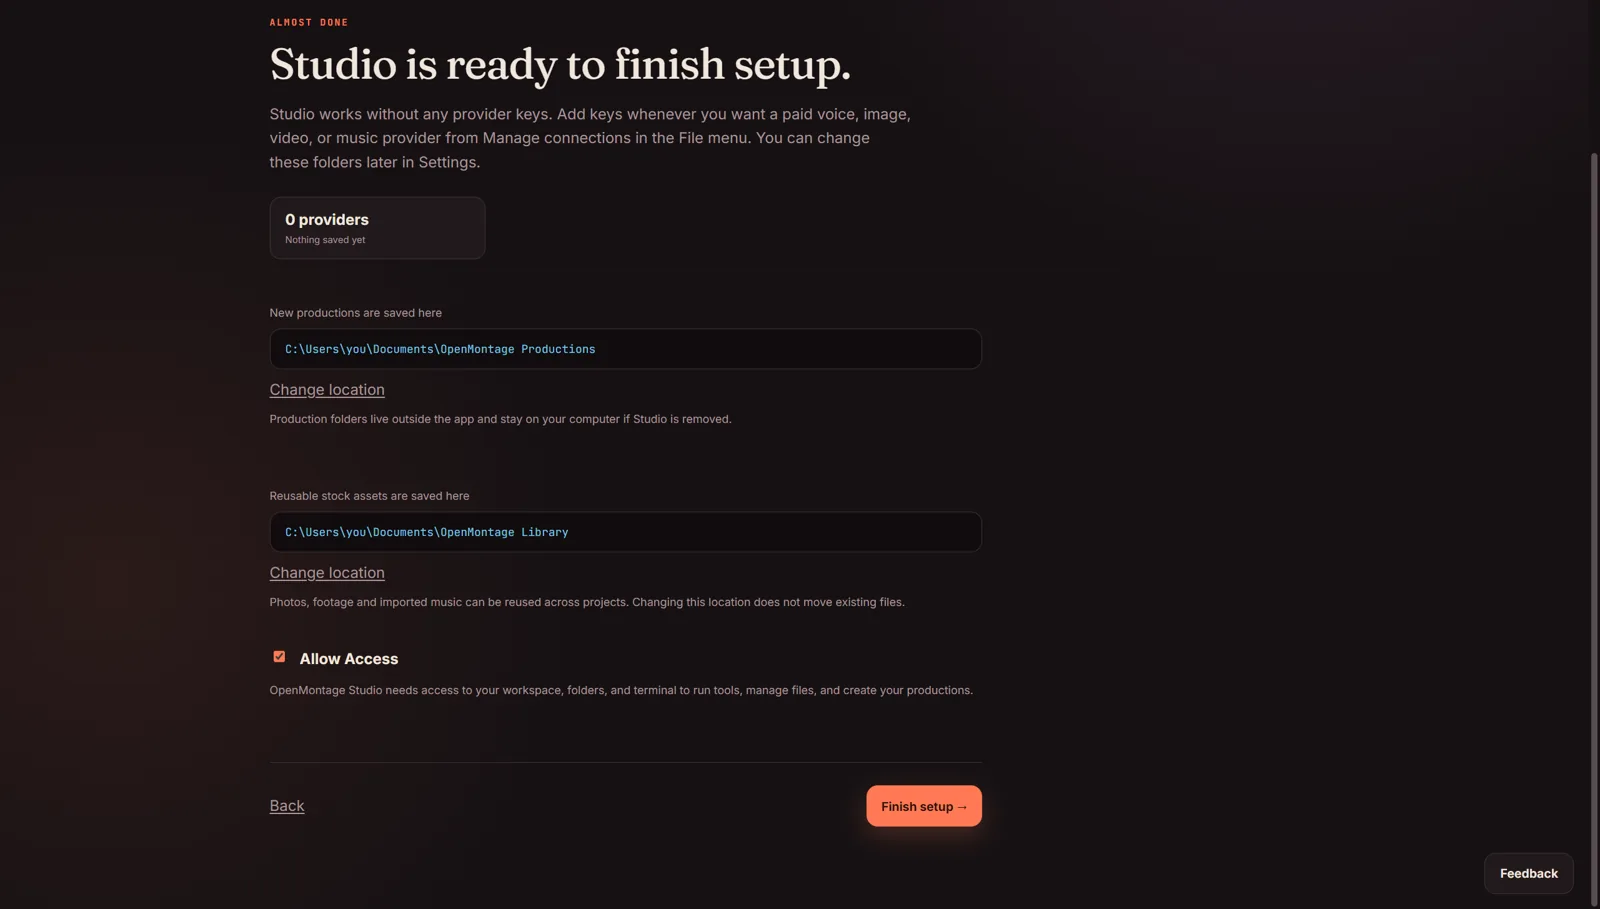
- Check the production folder. Use Change location if needed.
- Read the access description. Allow Access lets Studio use local folders, tools and the terminal.
- Click Finish setup. On an already configured app, the button says Open Studio.
Look for: the “What should we make?” home screen.
Make your first video
- Paste the example below, or describe your own video.
- Use Add files for your footage, logo, script or reference images.
- Set Length: 45s and Shape: 9:16. Deselect other shapes if you only want vertical.
- In Finish, select narration, music and captions.
- Choose Standard to review along the way.
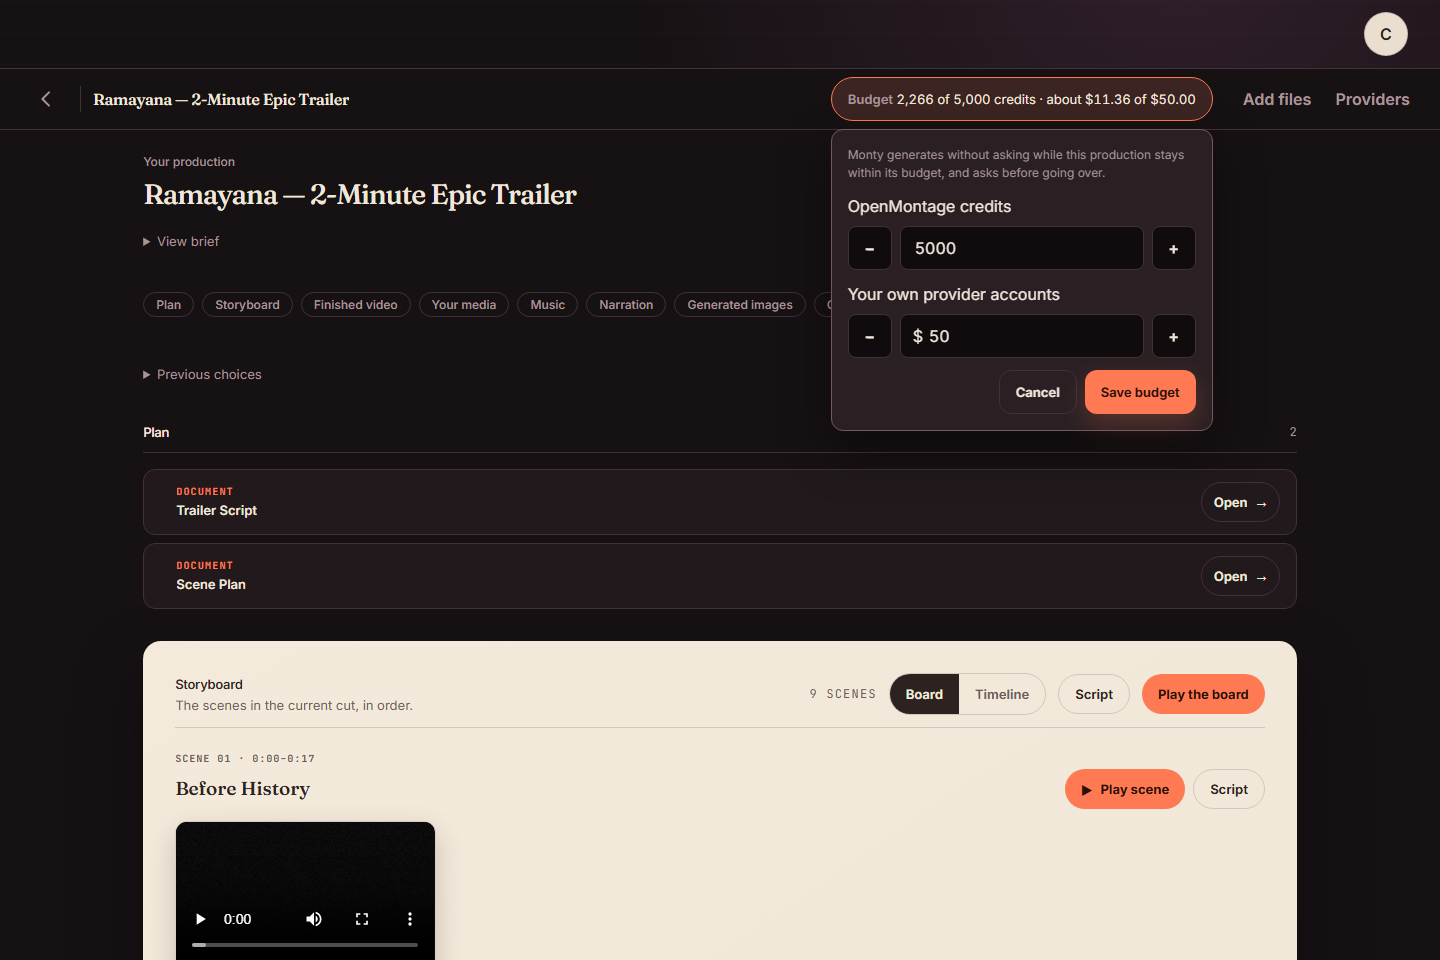
- Check your media selections under Generate, then check the budget.
- Click Start production. Read Monty’s plan and answer its questions.
- Review the first cut. Tell Monty what to change.
Make a 45-second vertical video explaining how bees make honey, with calm narration, gentle music and captions. Use my connected services and stay within my budget.
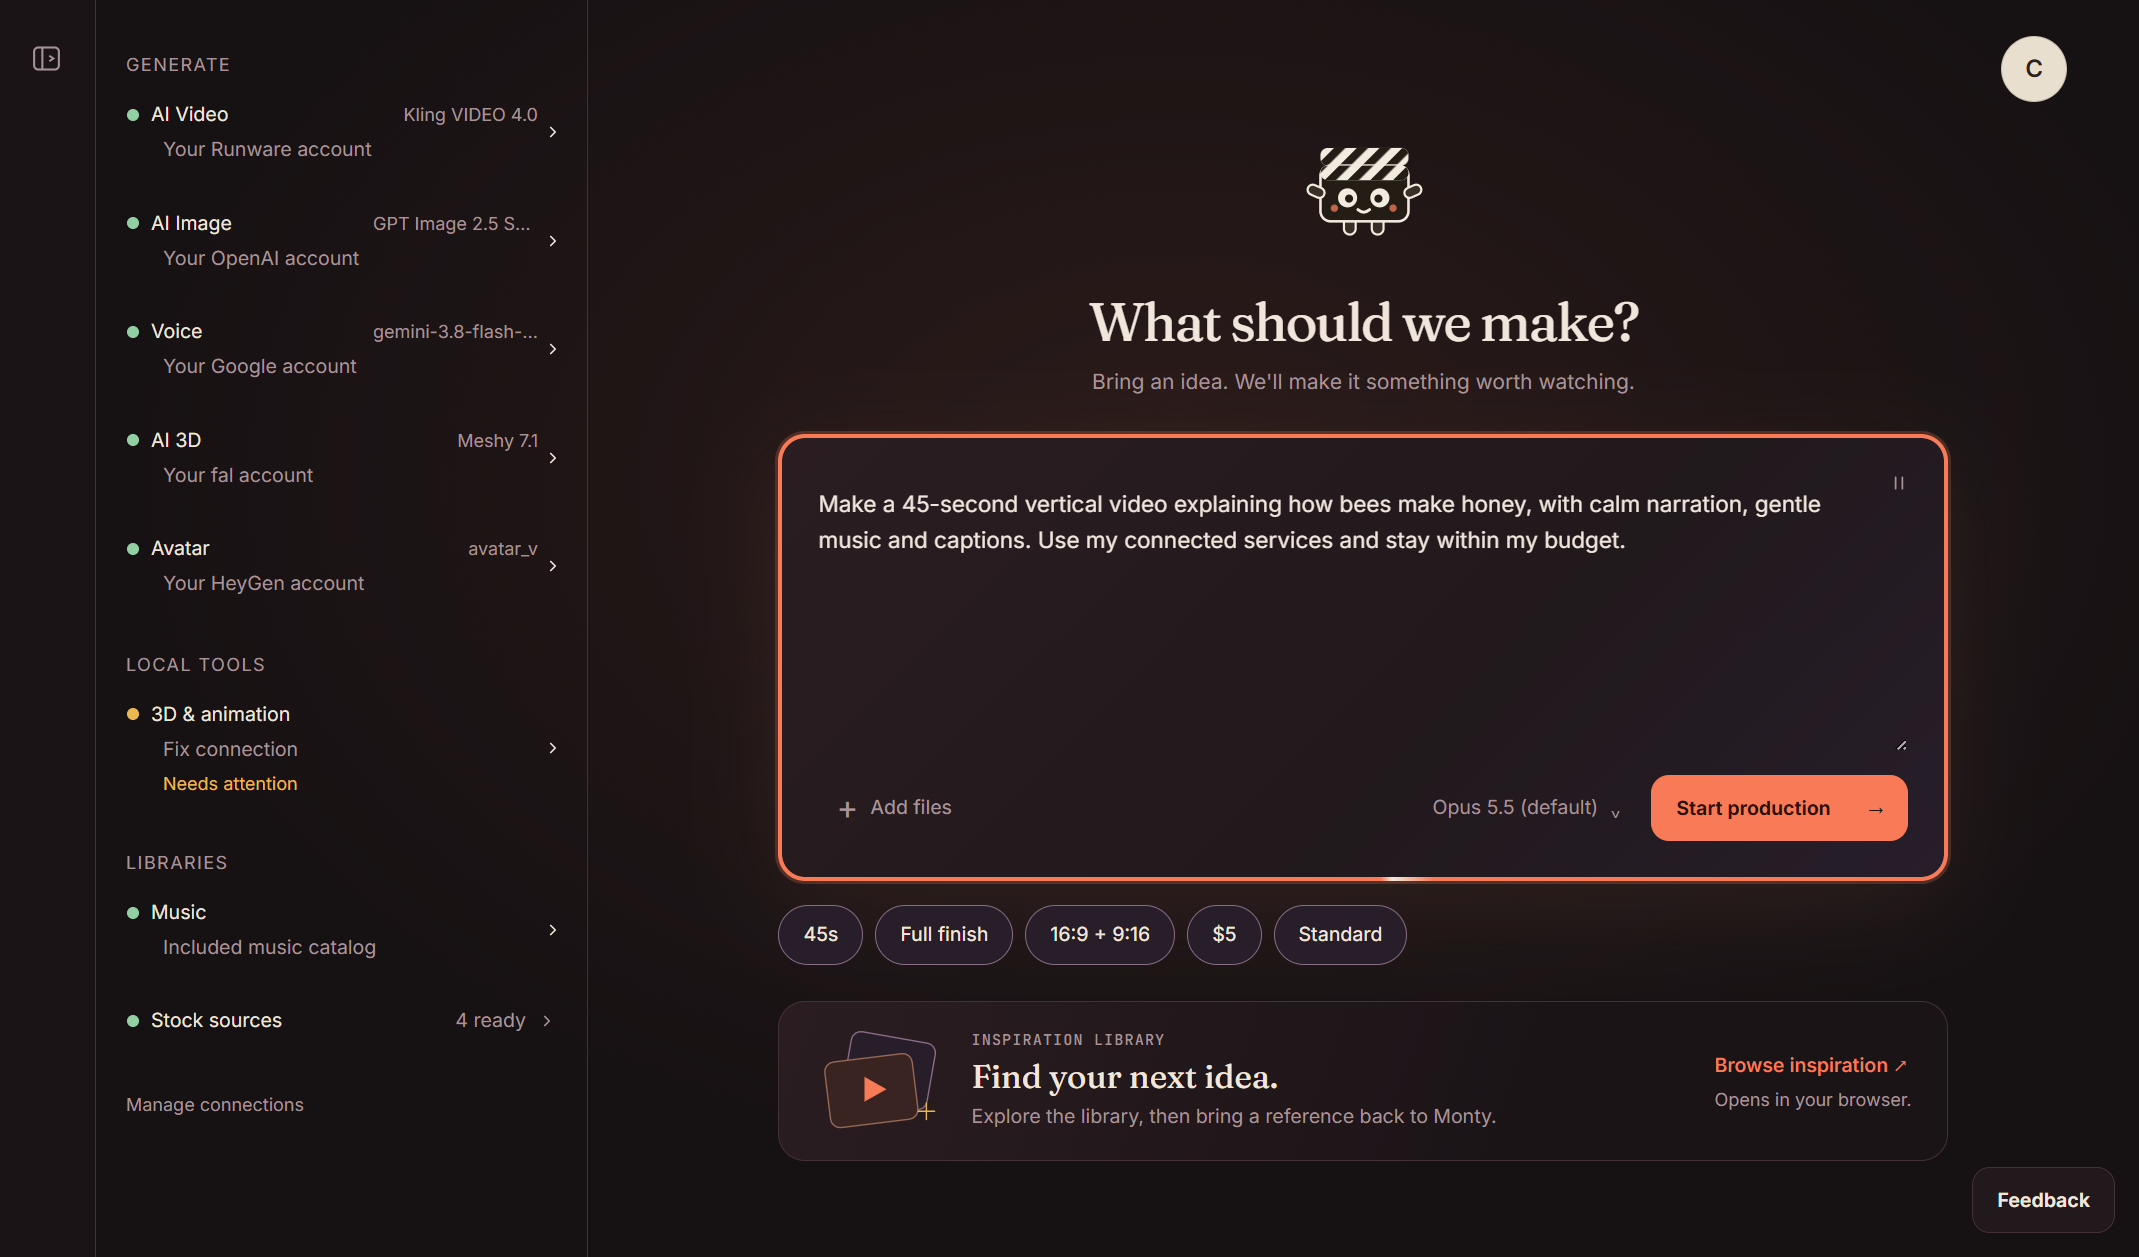
Length, finish, shape and mode
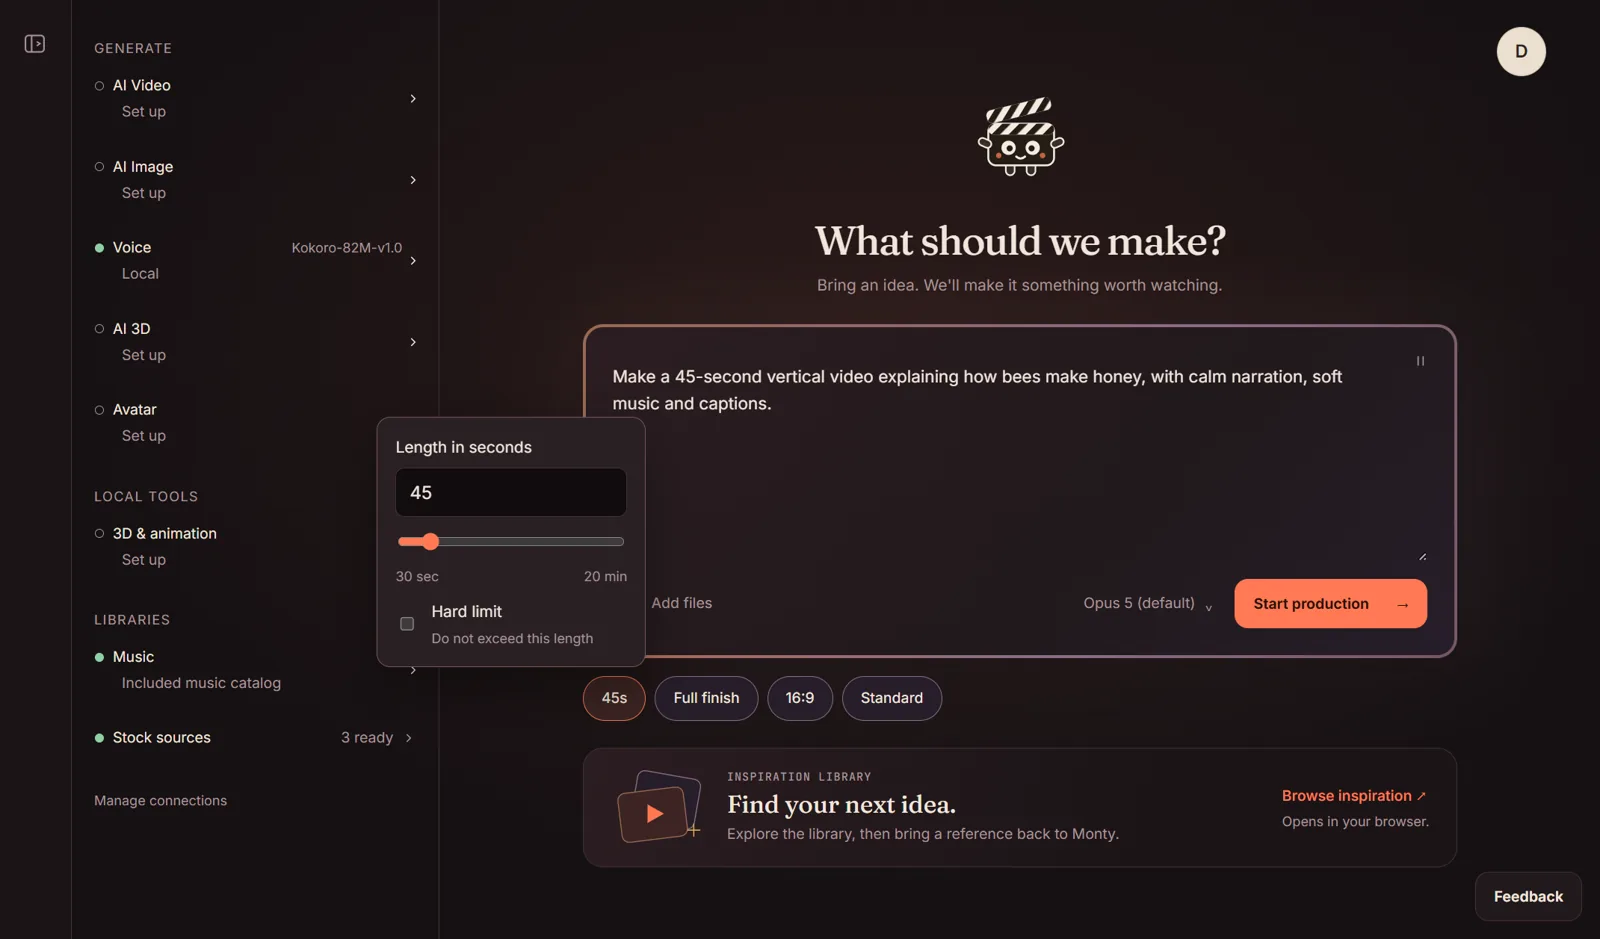
Drag to set the length, from 30 seconds to 20 minutes. Tick Hard limit if it must not run over.
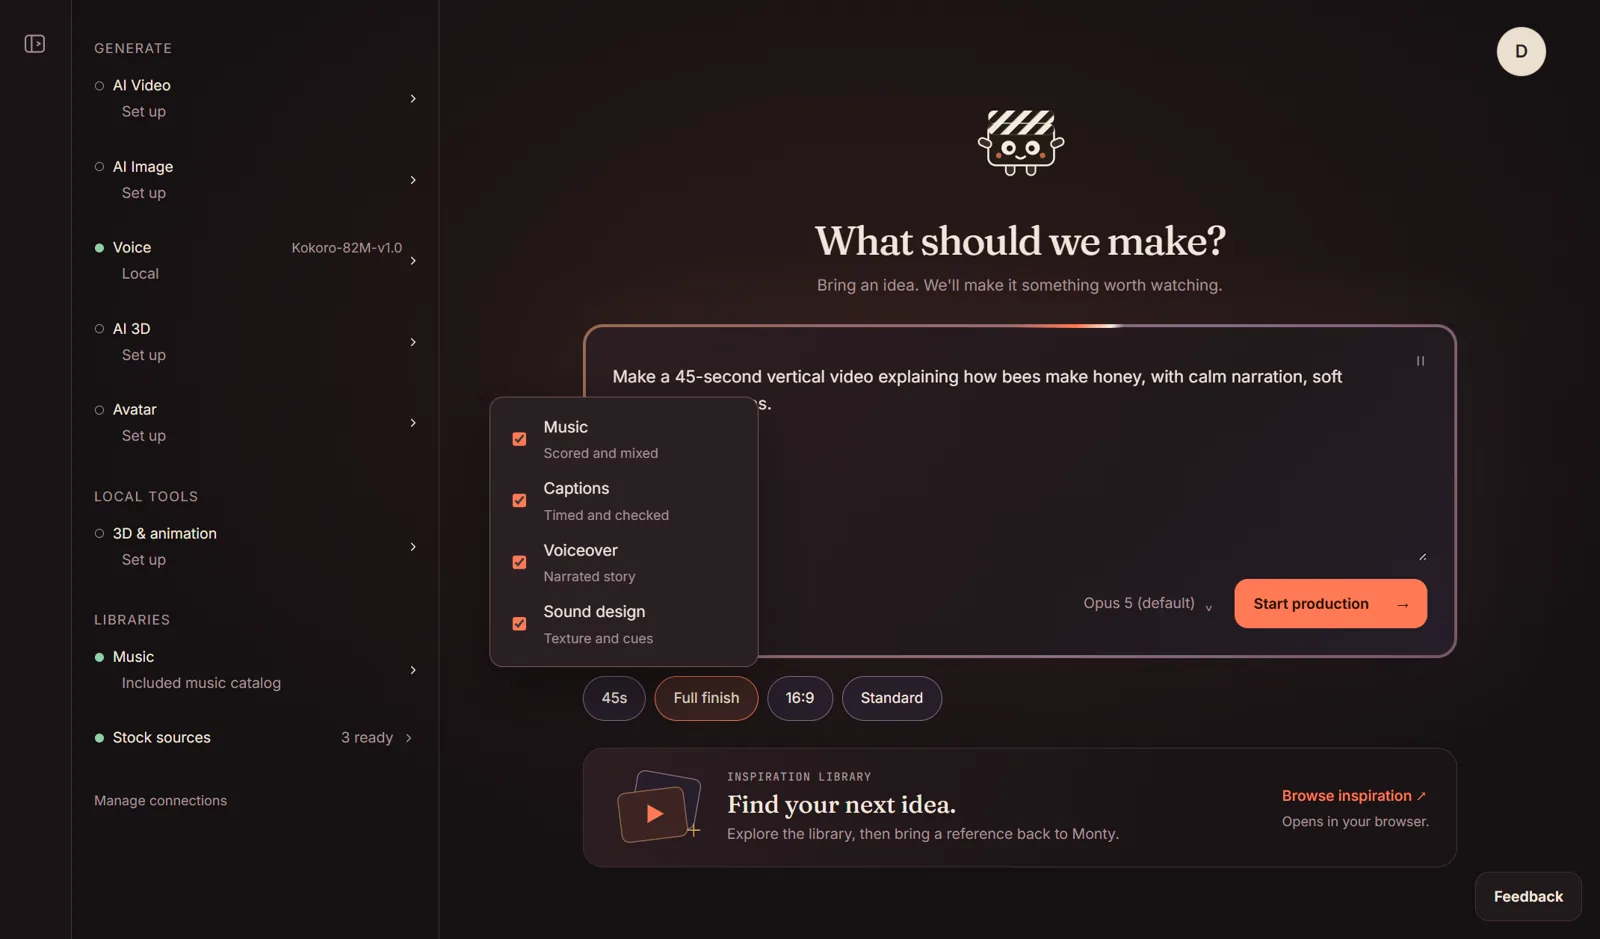
Tick what the video needs: Music, Captions, Voiceover, Sound design.
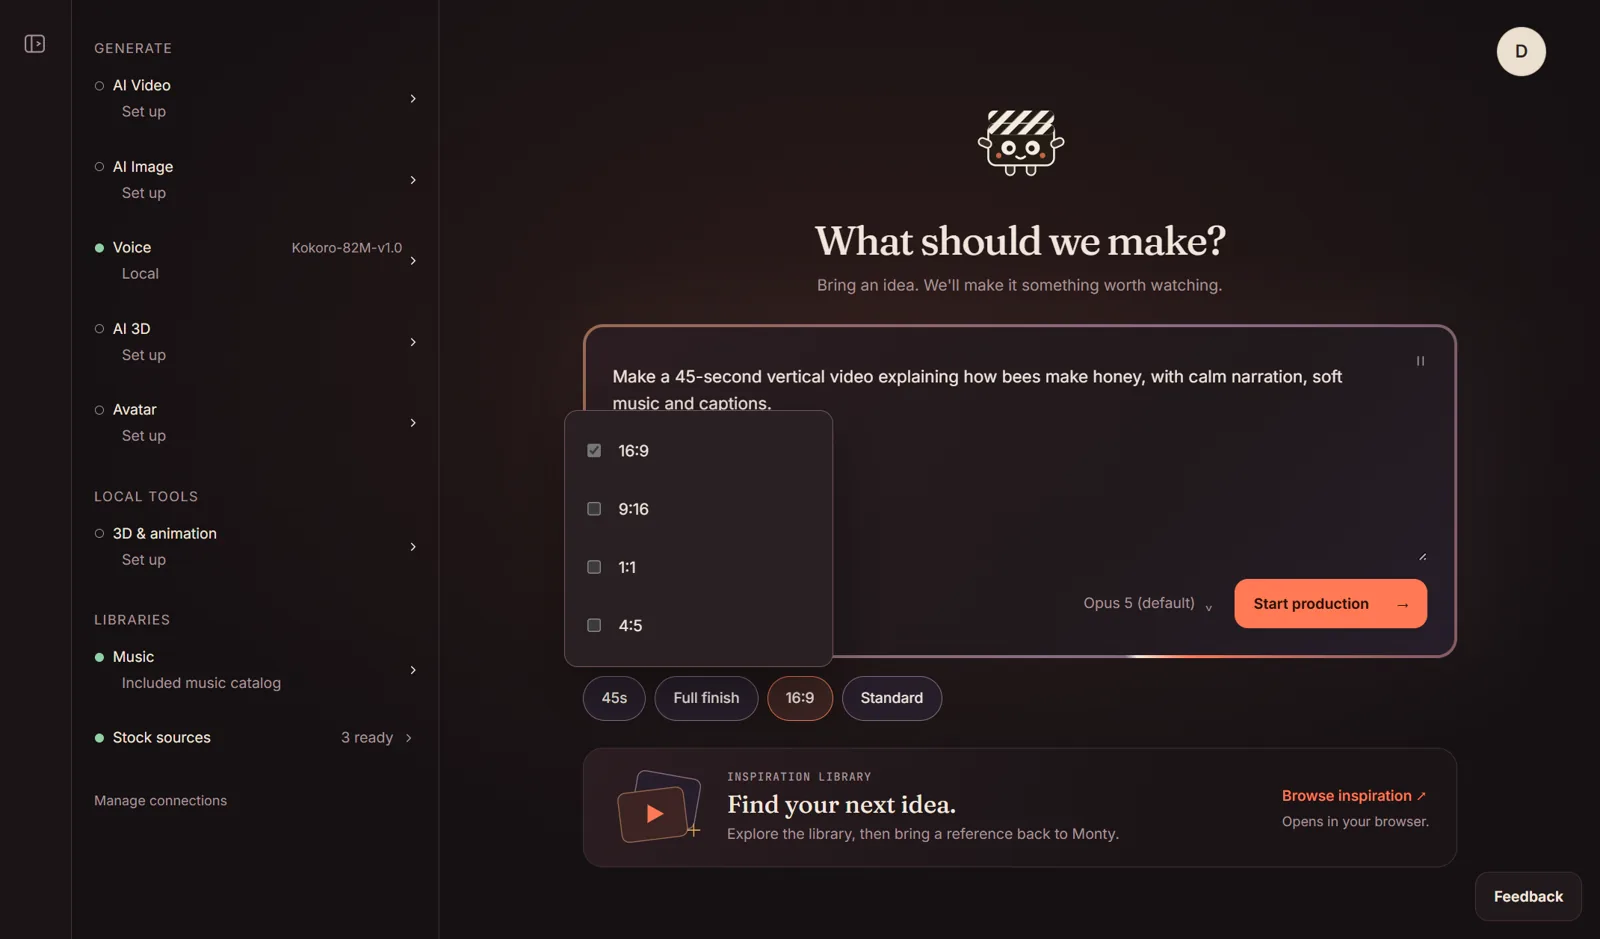
16:9 for YouTube and screens, 9:16 for Reels, Shorts and TikTok, 1:1 square, 4:5 for feeds.
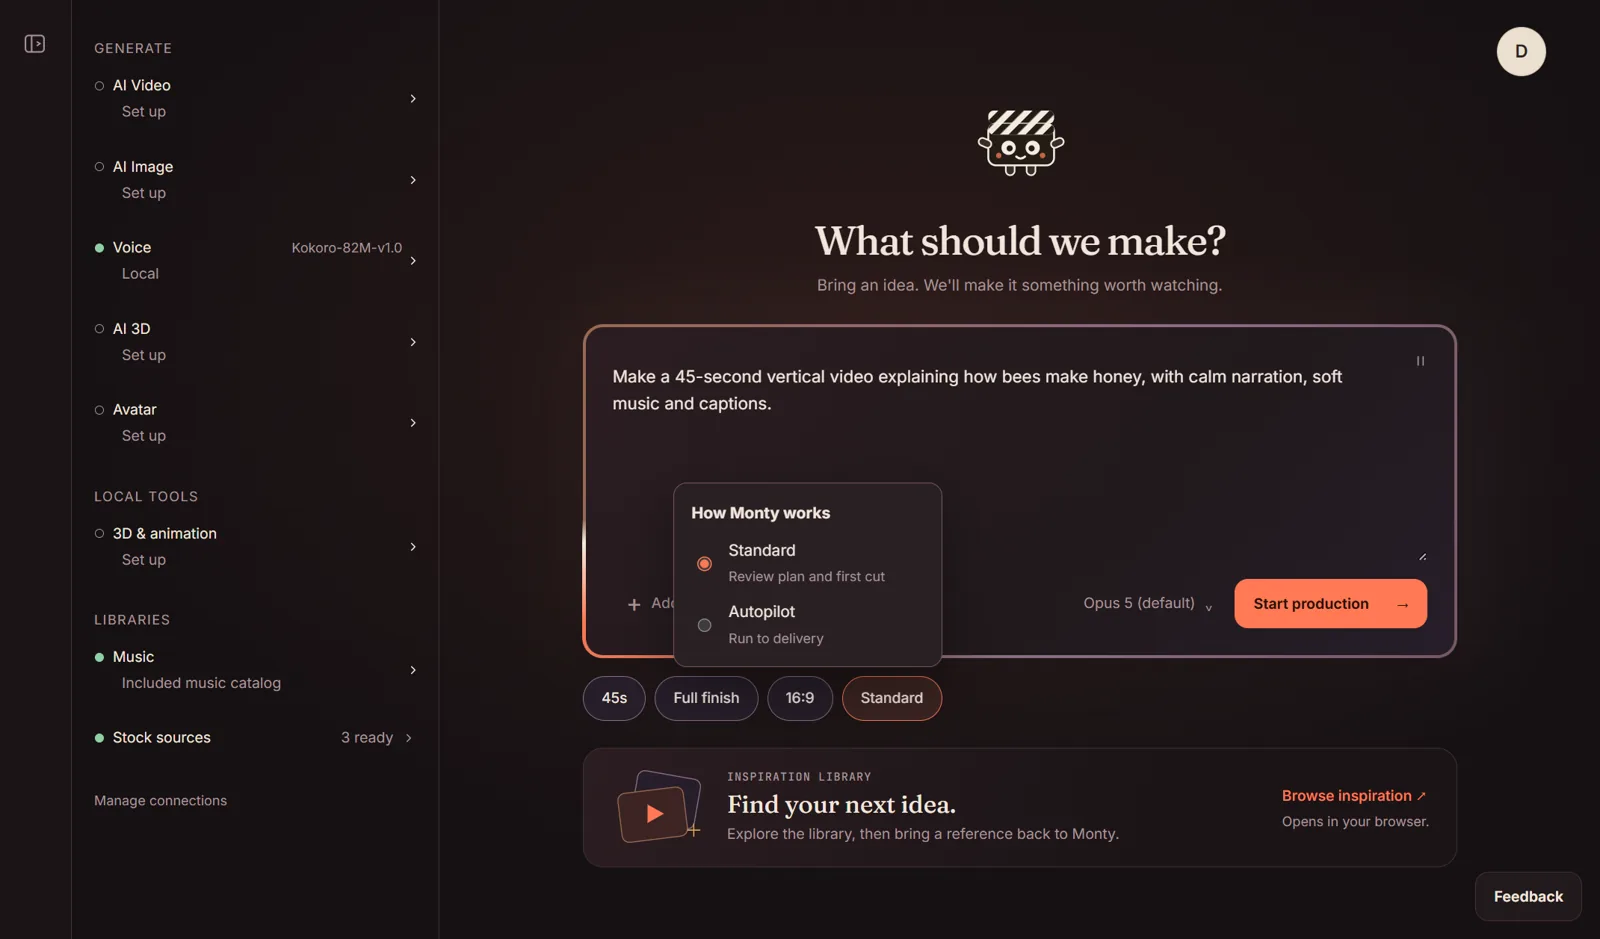
Standard: you review the plan and the first cut. Autopilot: Monty runs straight to the finished video.
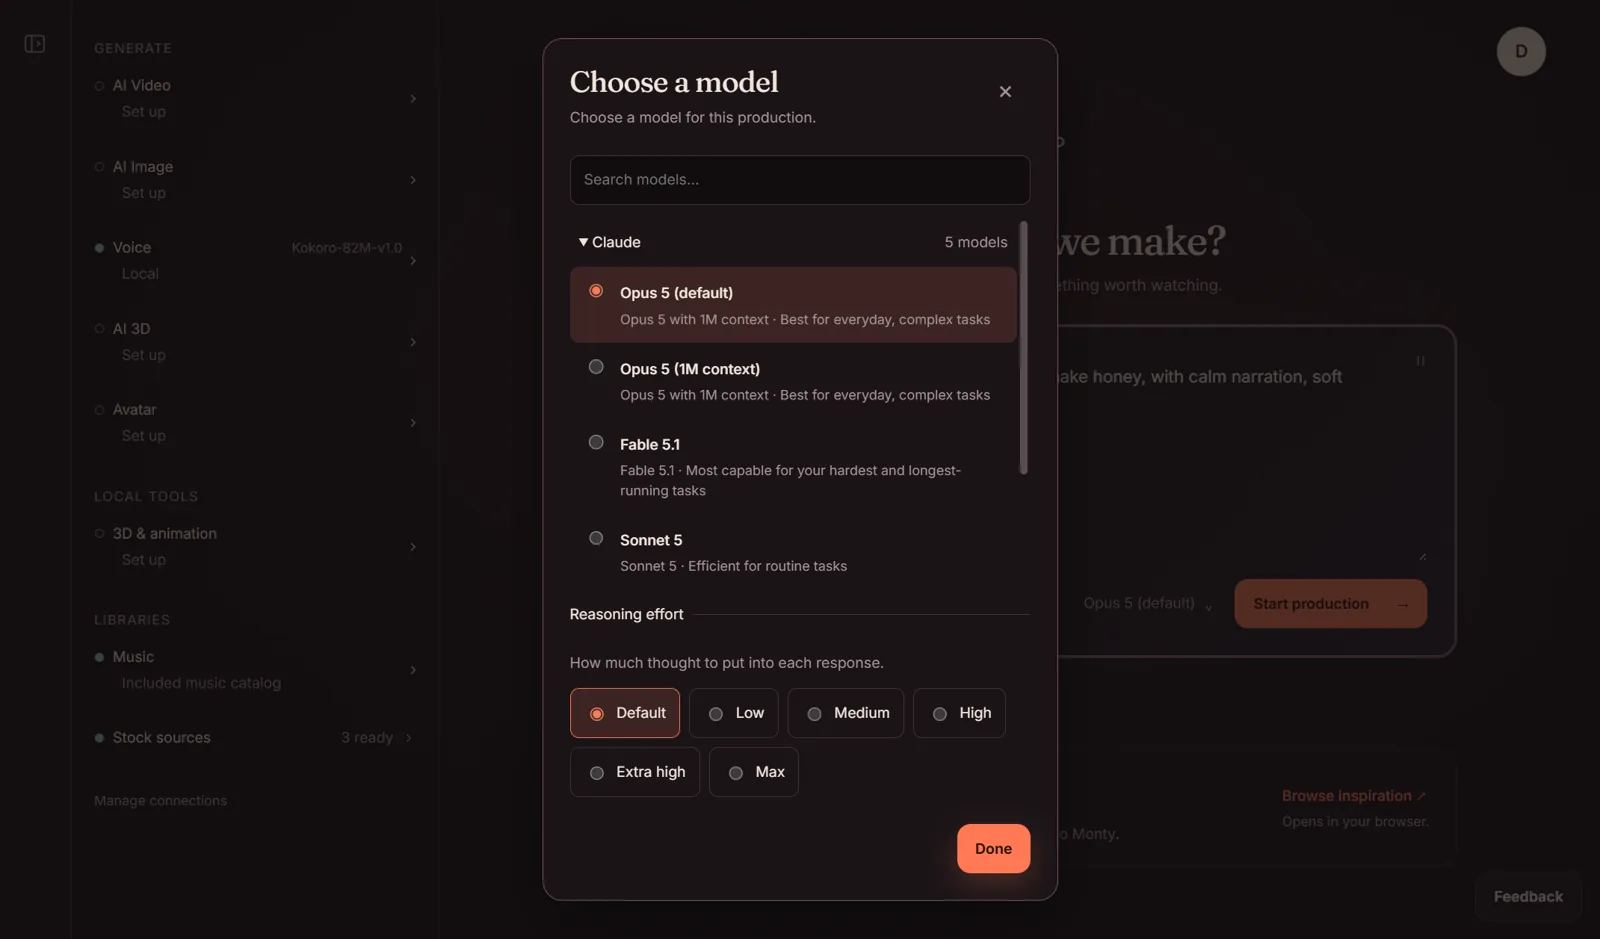
Pick the model and how much thought it puts into each reply. Default suits most videos.
Set a spending limit
- Open the budget control before starting, or Budget inside a production.
- Set the limit for your own provider accounts; credits appear where available.
- Save the budget. Monty asks before going over it.
Start from an inspiration reference
- On the home screen, click Browse inspiration. It opens in your browser.
- Browse videos, images or music. Open an item to preview it.
- Click Copy reference.
- Return to Studio or your external agent and paste the reference.
- Add what you want to change: subject, brand, format, mood or length. Send your request.
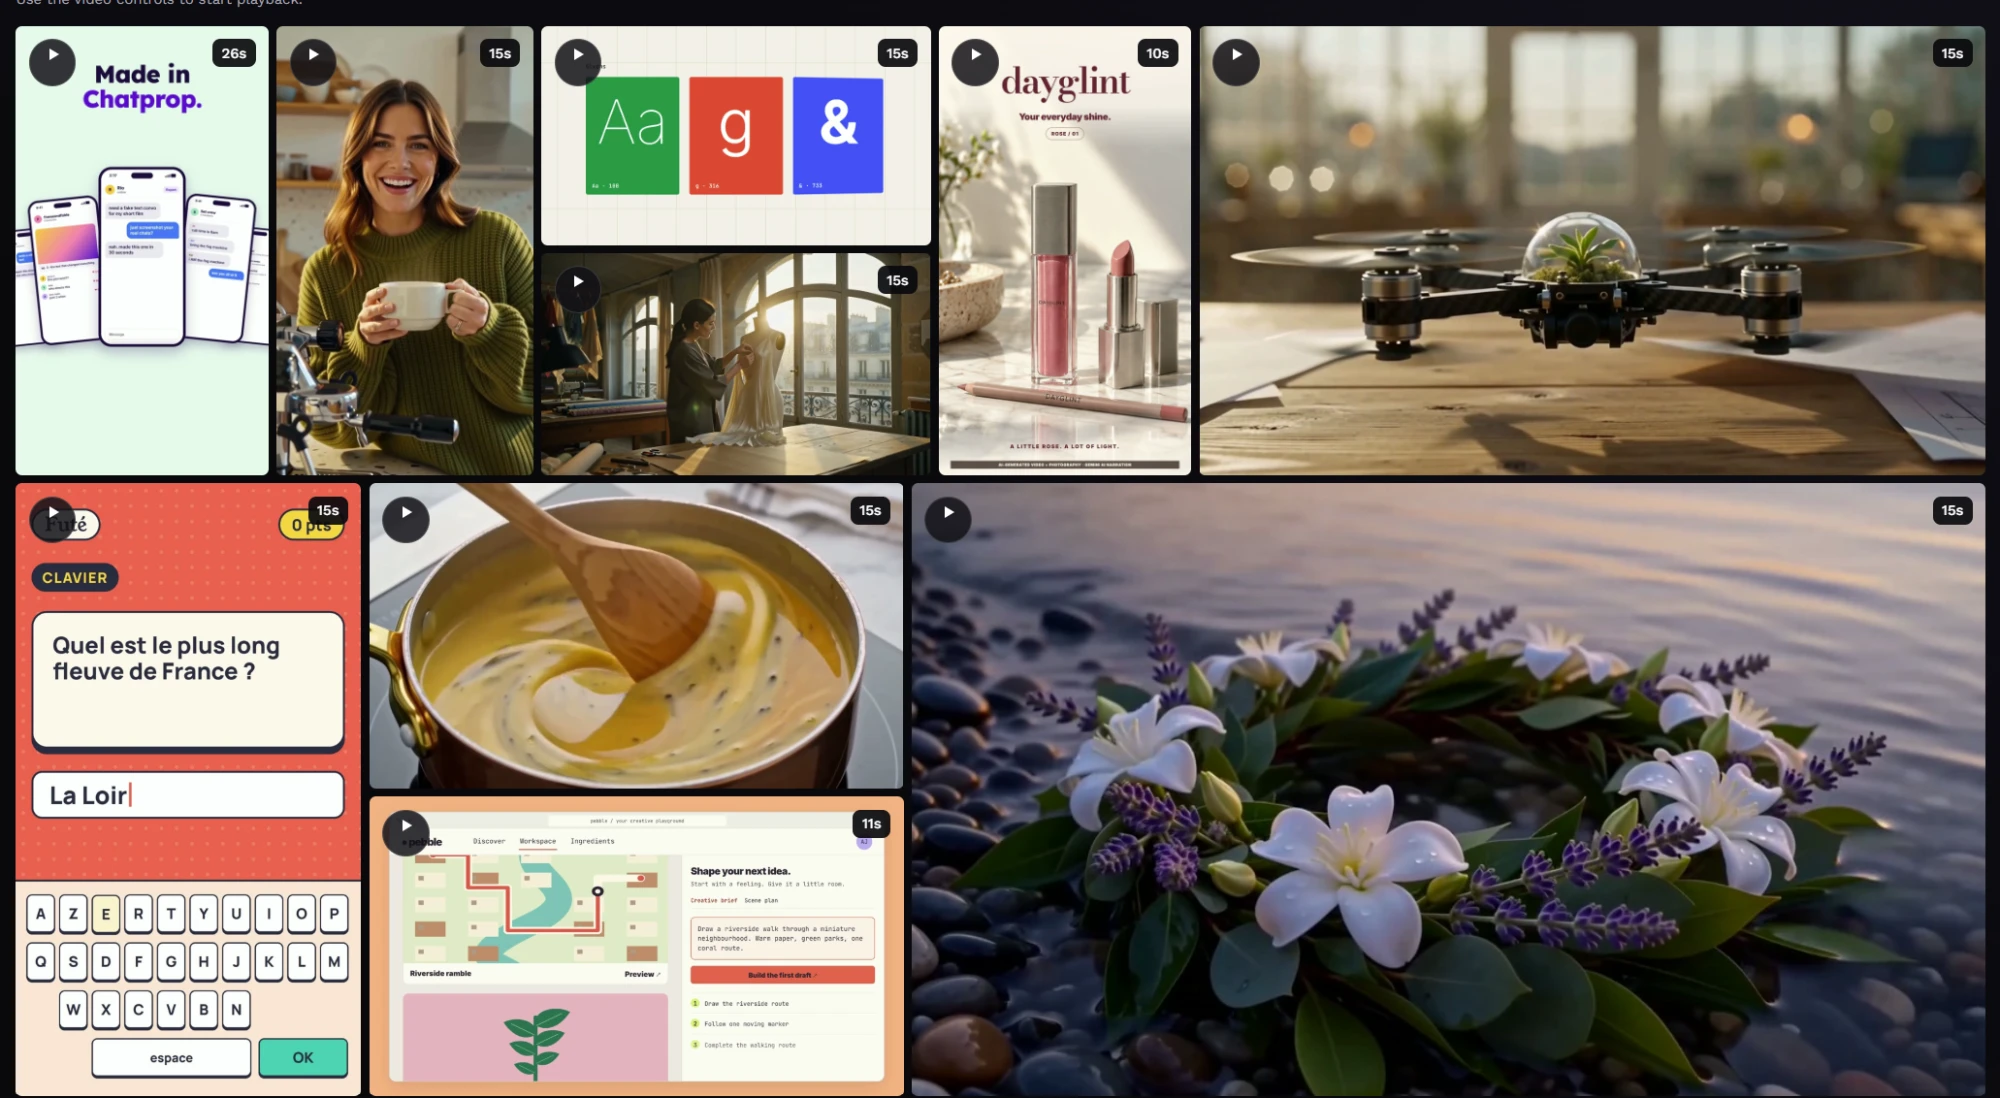
Use this reference for a 20-second vertical ad for my coffee shop. Keep the visual style; use my logo and warm colours.
Look for: the copied reference in your message, followed by your requested changes.
Review, revise and save
- Open Your productions and select a production to resume it.
- Use Plan to read the script and scene plan.
- Open Storyboard. Choose Board or Timeline; use Play scene or Play the board.
- Send a specific change, such as “Shorten the opening to 3 seconds and keep the rest.”
- Open Finished video and watch the latest result.
- Click Open to access the file. Your production files stay in your chosen production folder.
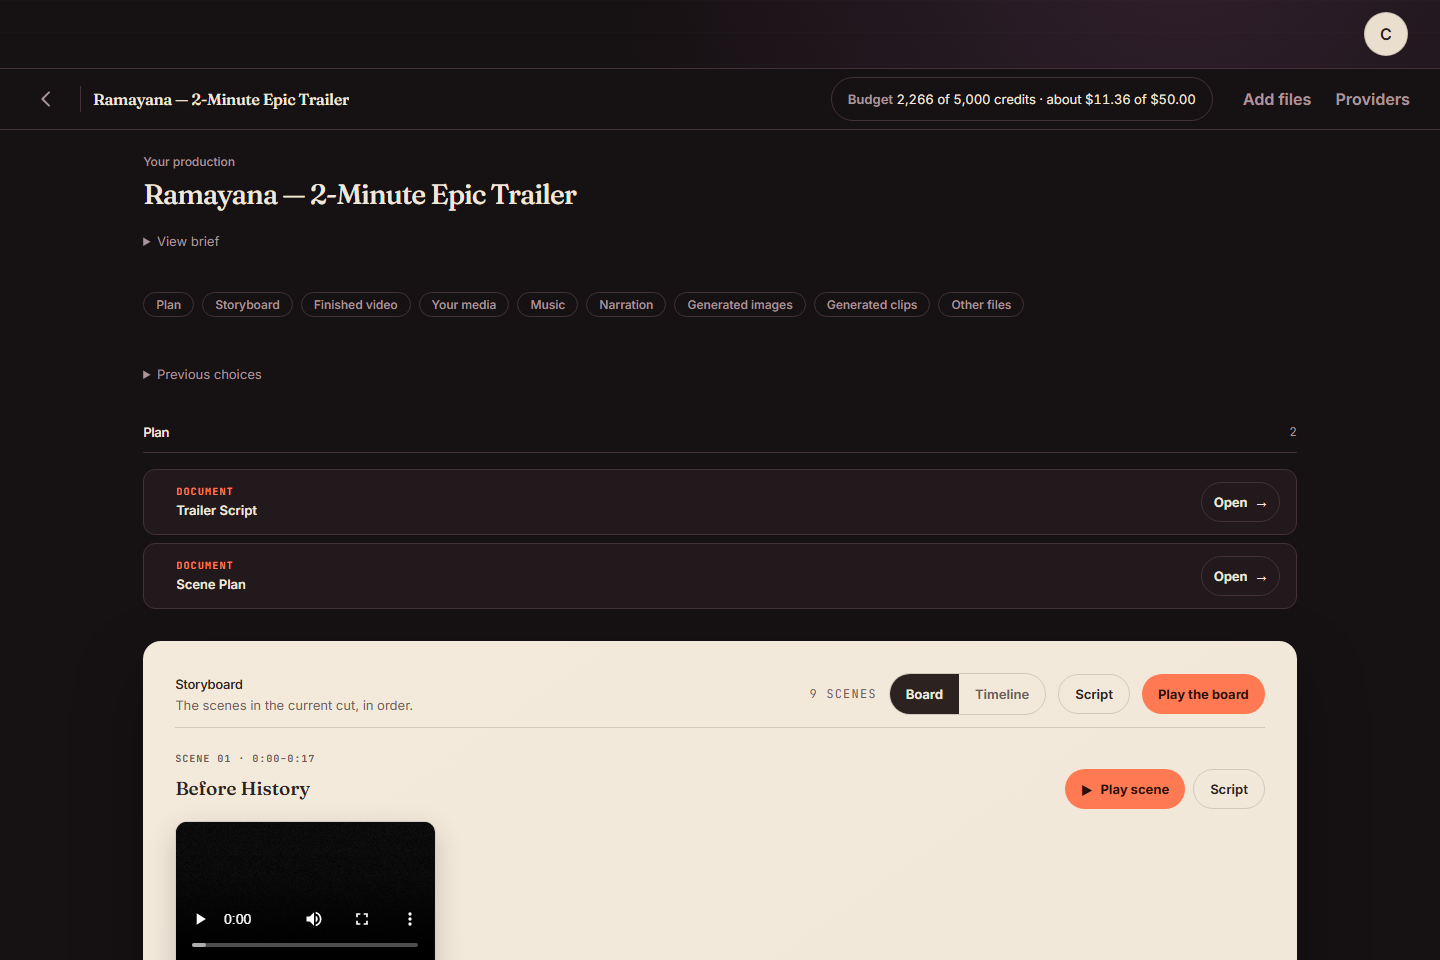
Storyboard views
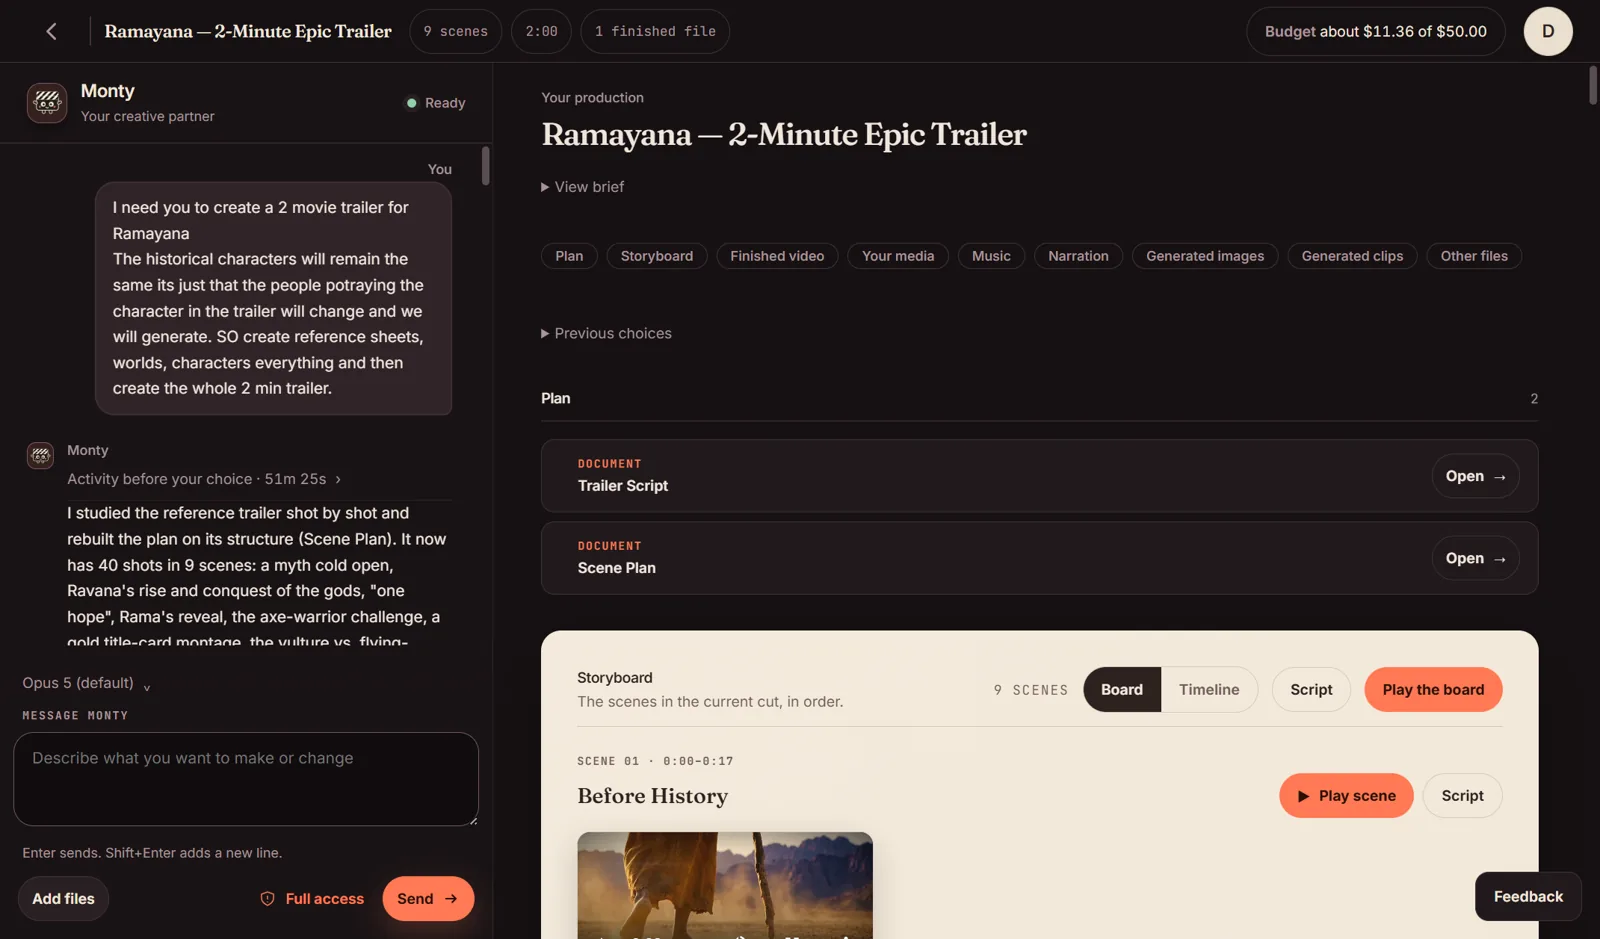
Board shows each scene as a card. Click Play scene to watch one.
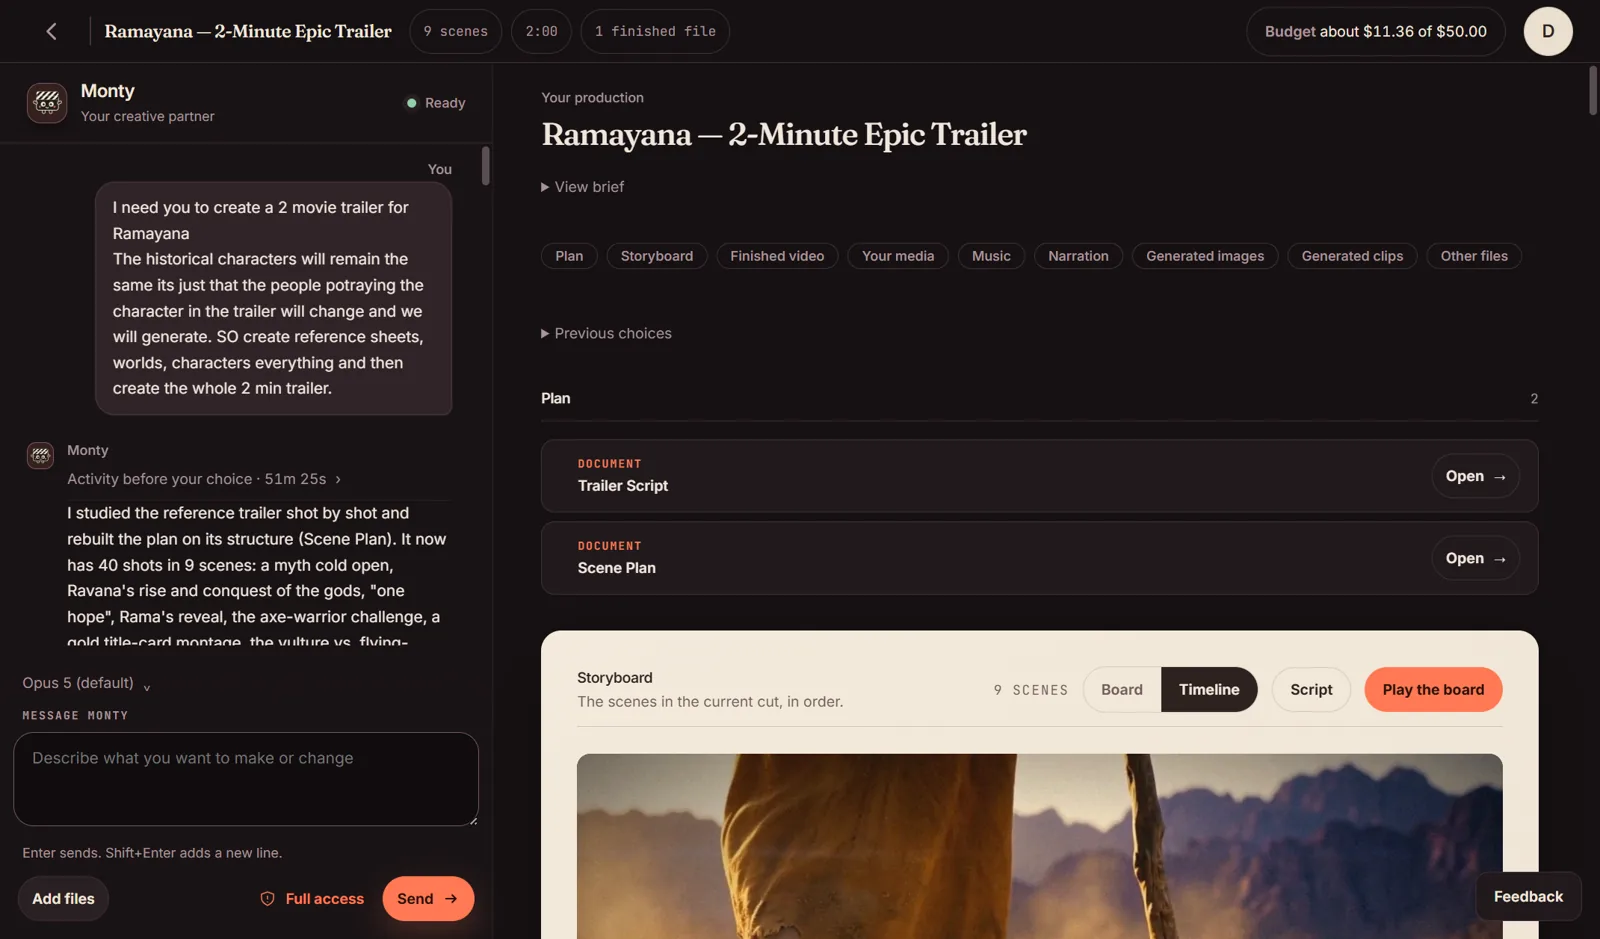
Timeline shows the scenes as one strip, with their timing.
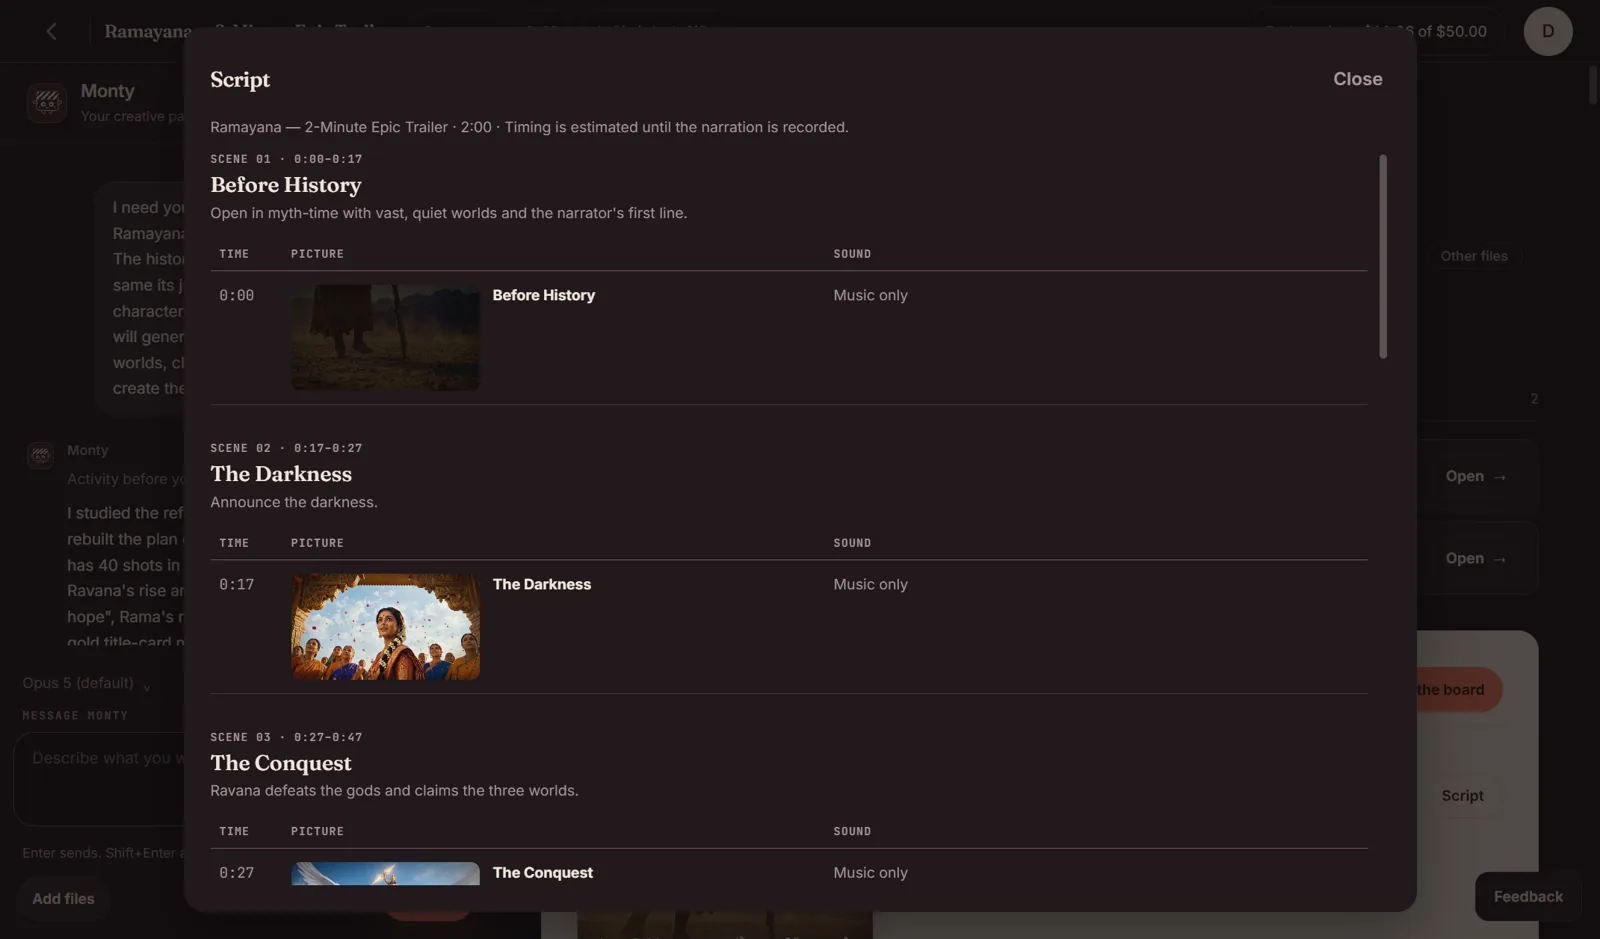
Script shows the words, pictures and sound for every scene, with timings.
Finished video and generated media
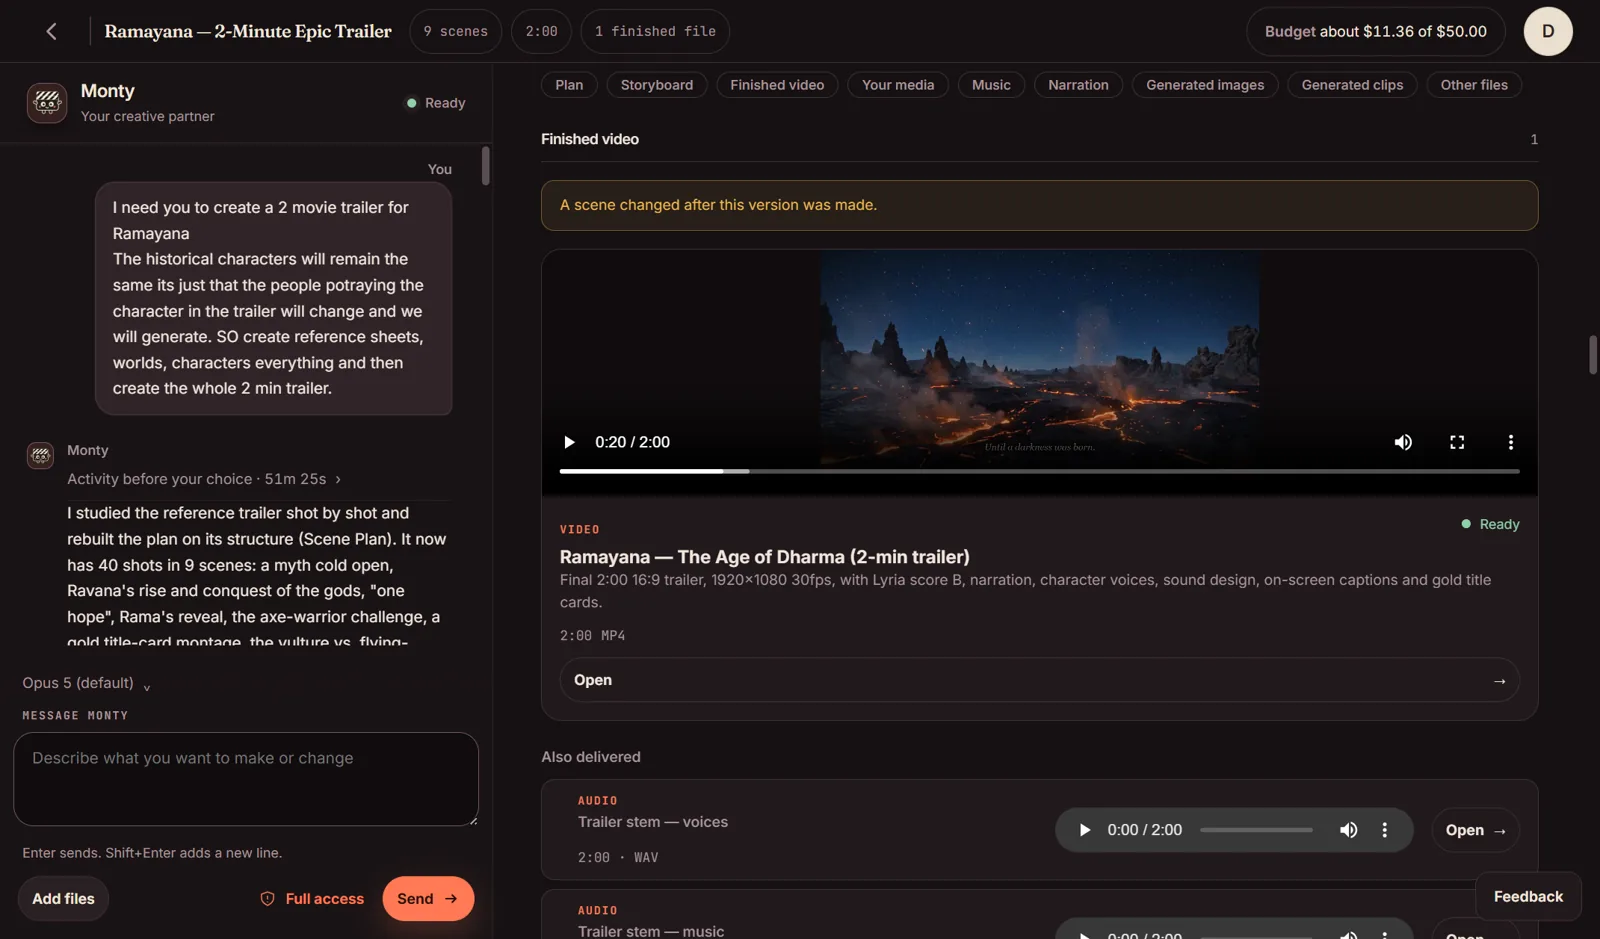
The finished film, ready to play and share. Click Open to see the file.
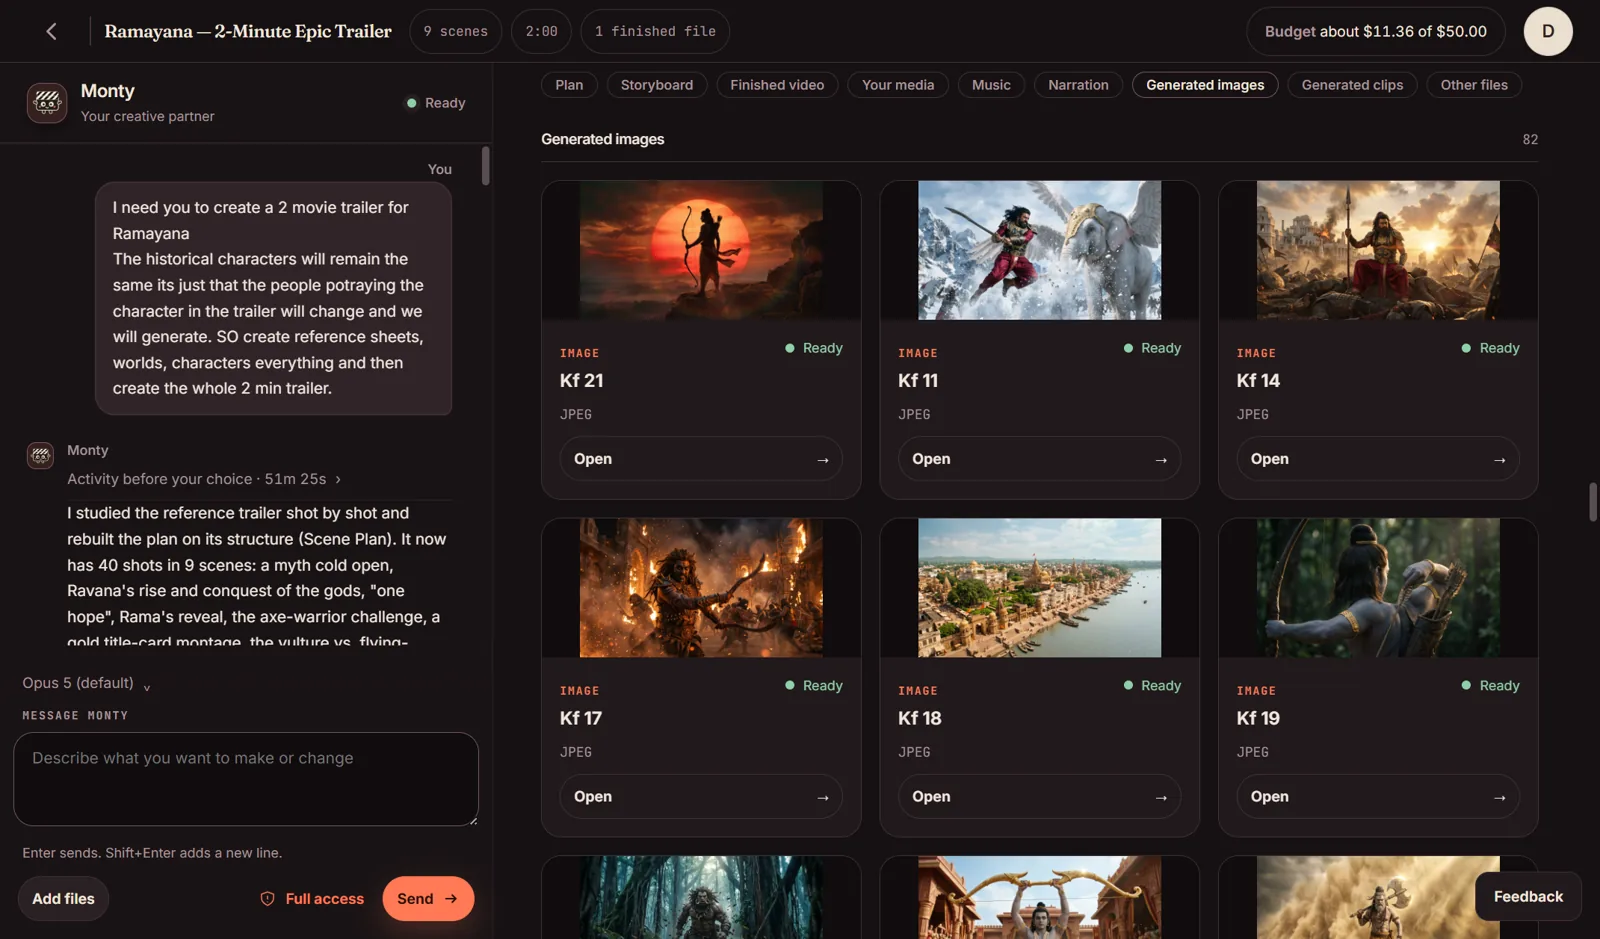
Every picture Monty generated.
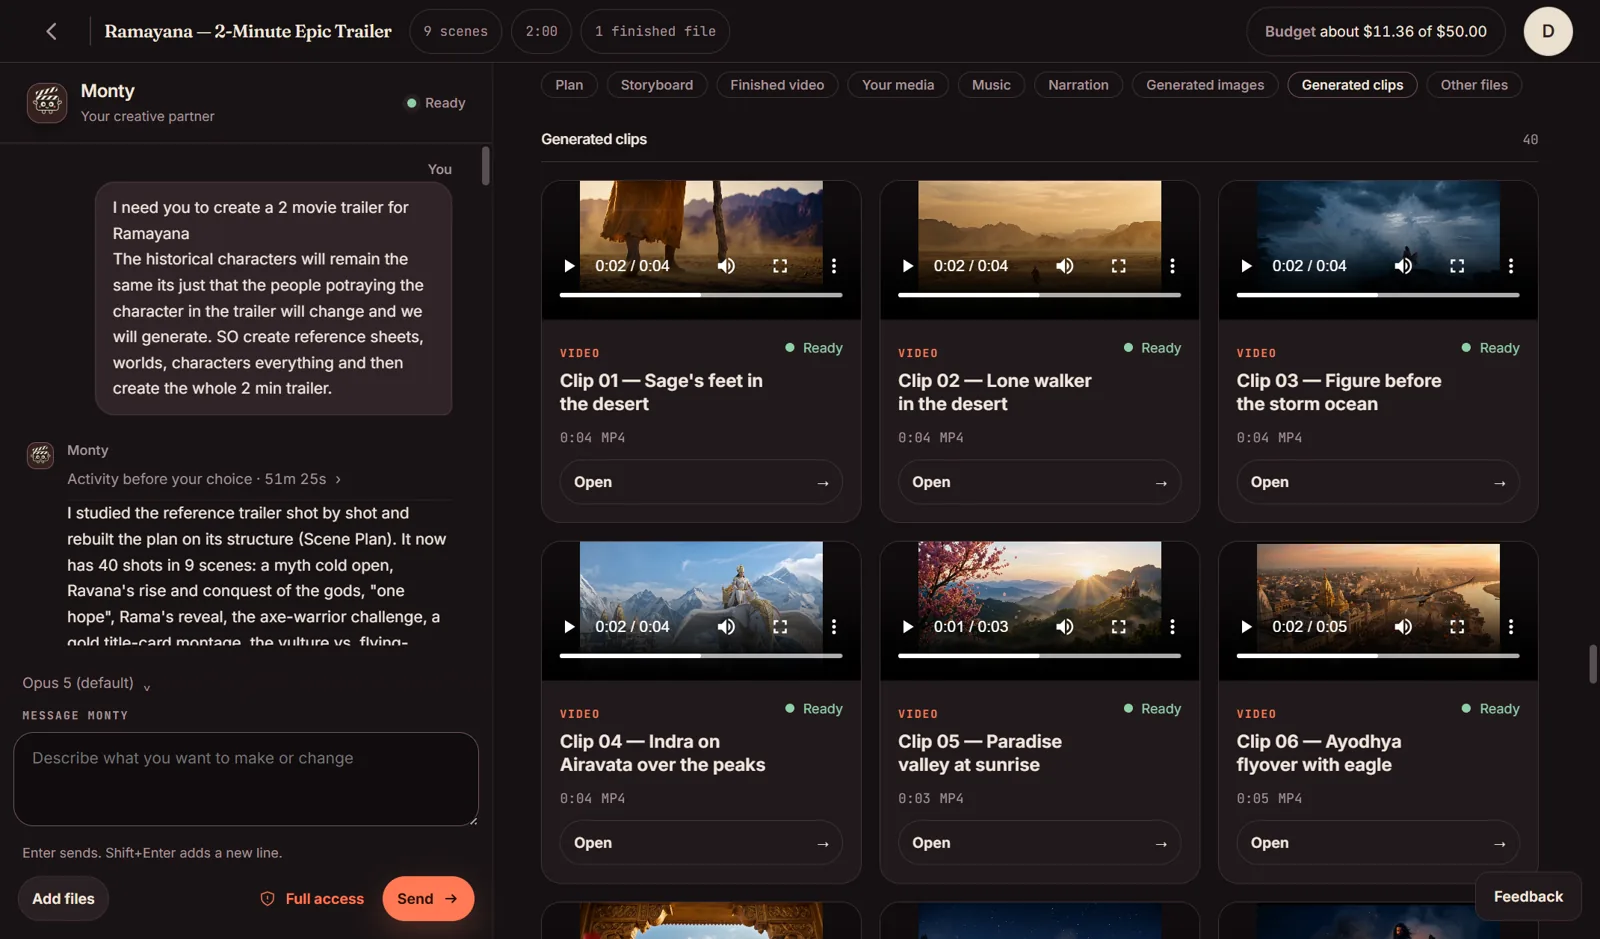
Every video clip, playable right here.
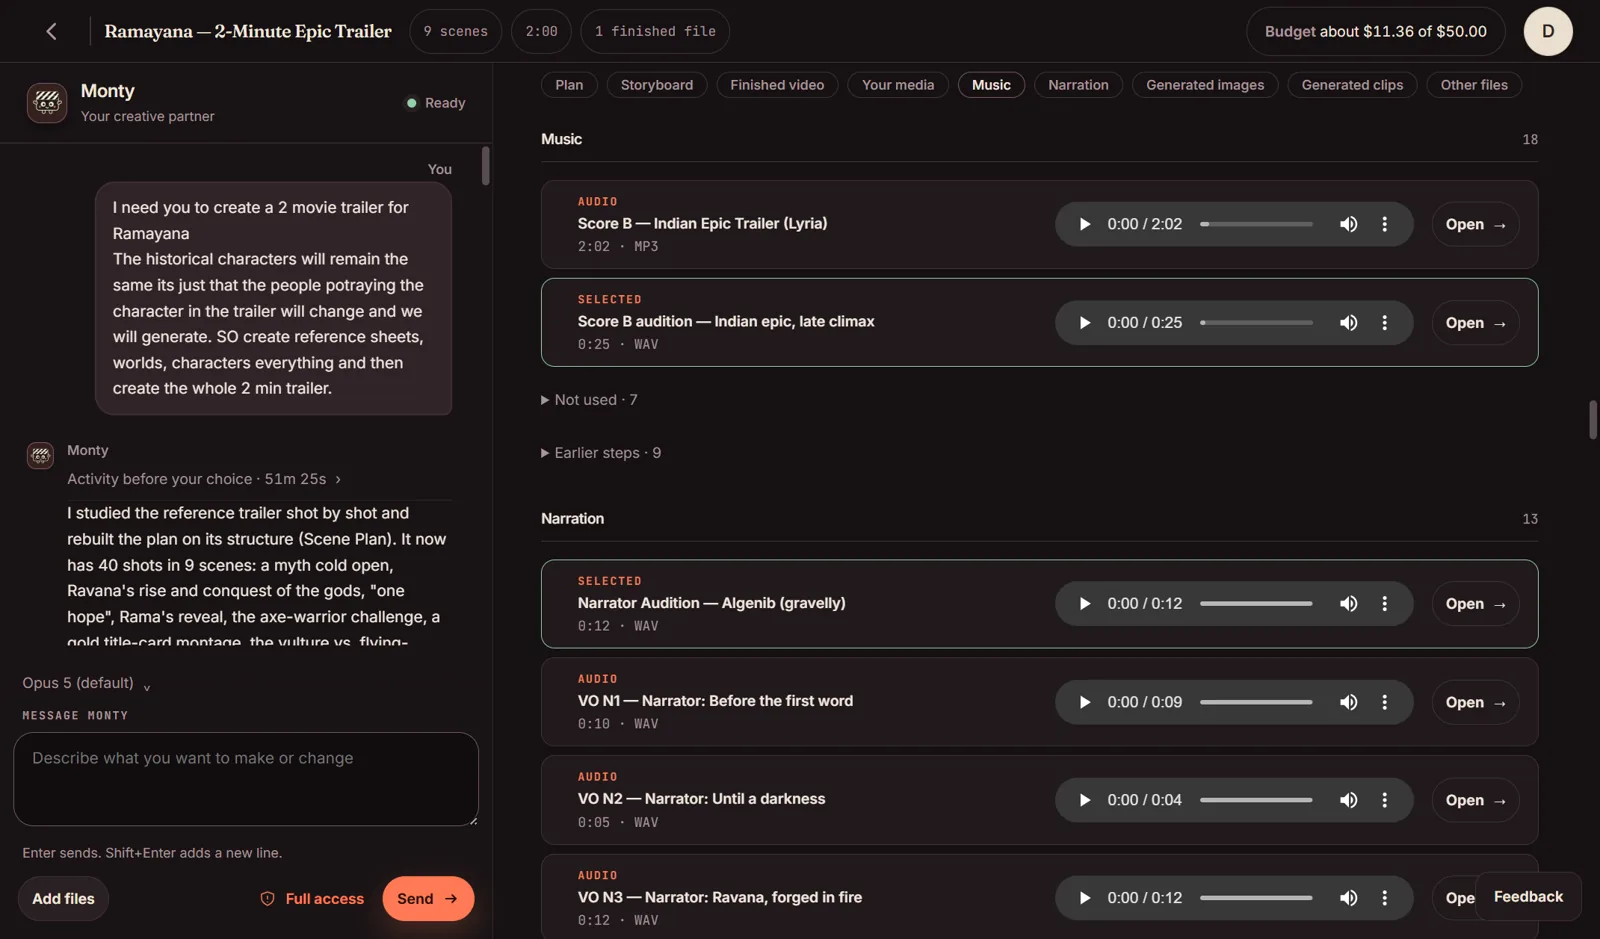
The music options. The one marked Selected is in the film.
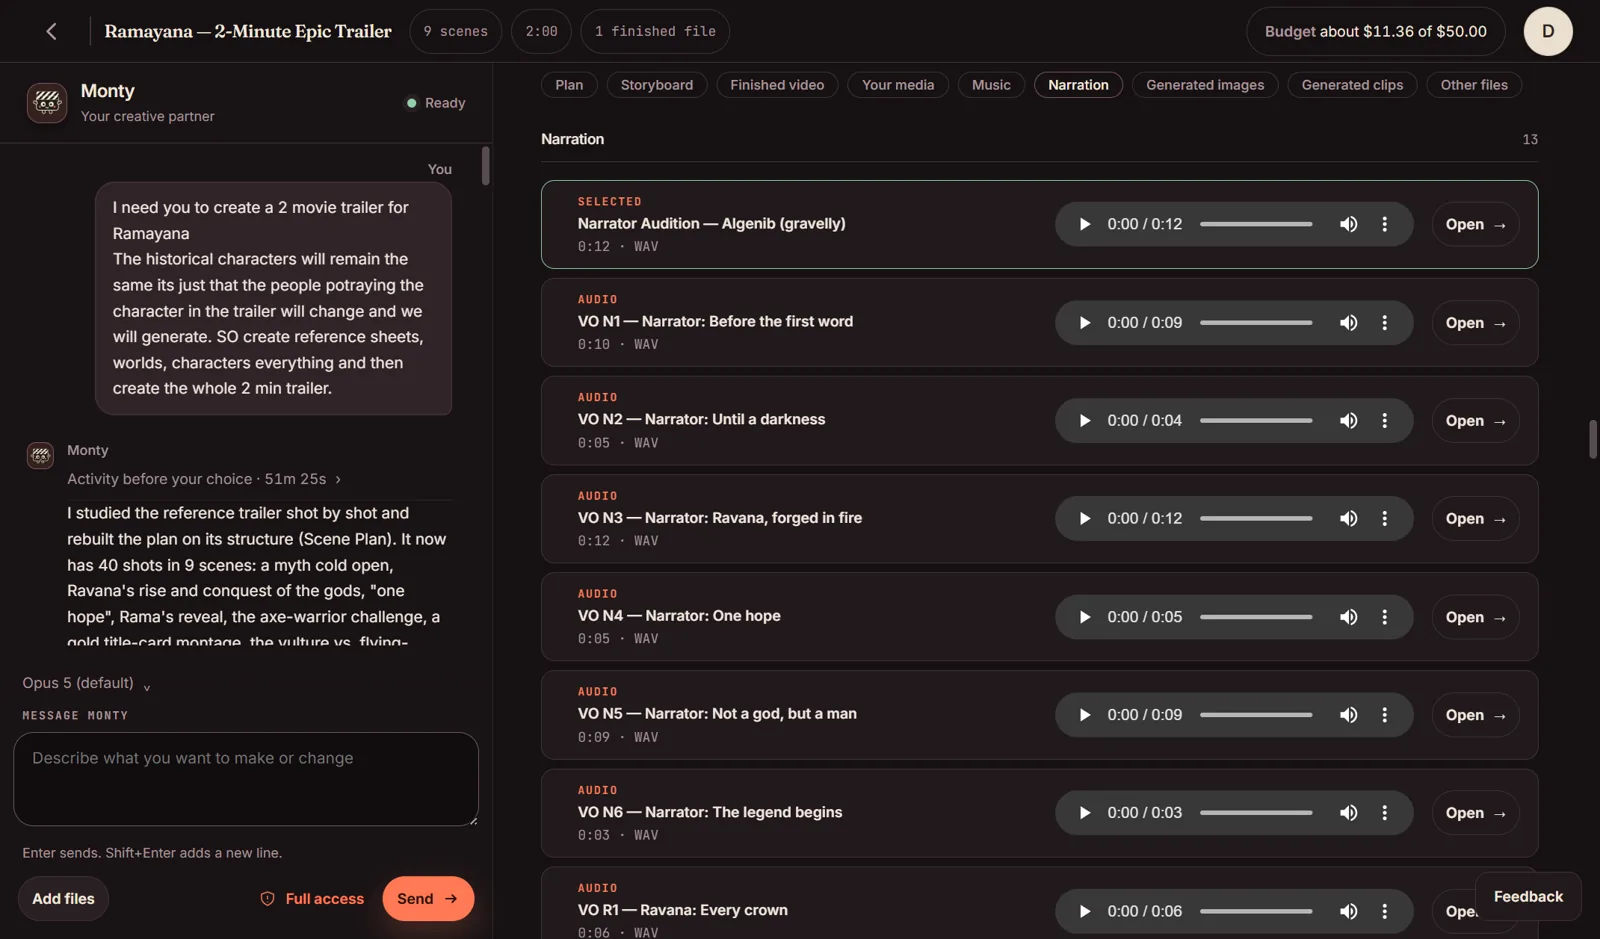
Each line of voiceover, playable on its own.
A “scene changed” notice means the displayed film predates an edit. Ask your agent to render the updated cut.
If you get stuck
- Invitation not recognised
- Use the exact email address that received the invite. Check which account Google selected.
- No verification email
- Check Spam and the email address you entered. Use the verification screen’s resend option if available.
- Browser sign-in finished, but Studio did not connect
- Return to Studio. If the request expired, start Sign in again from the app.
- Secure account storage error
- Retry Sign in. If it persists, send feedback with the exact error. Do not delete your saved account files.
- Continue is disabled
- Finish any agent installation/update, complete sign-in, then click Check again.
- Provider says Not working
- Open Manage connections, check the provider account/key and billing, then Test & Save again.
- Local model is still downloading
- Wait for setup to finish before selecting it. Use the error shown if installation fails.
- Need help?
- Use Feedback in Studio. Include the step and error message; leave out passwords and API keys.